Physical Address
304 North Cardinal St.
Dorchester Center, MA 02124
Physical Address
304 North Cardinal St.
Dorchester Center, MA 02124

Explore practical guides and tools for Microsoft 365, Azure, and PowerShell. Enhance your cloud security and admin skills with expert insights and automation tips.
Explore practical guides and tools for Microsoft 365, Azure, and PowerShell. Enhance your cloud security and admin skills with expert insights and automation tips.
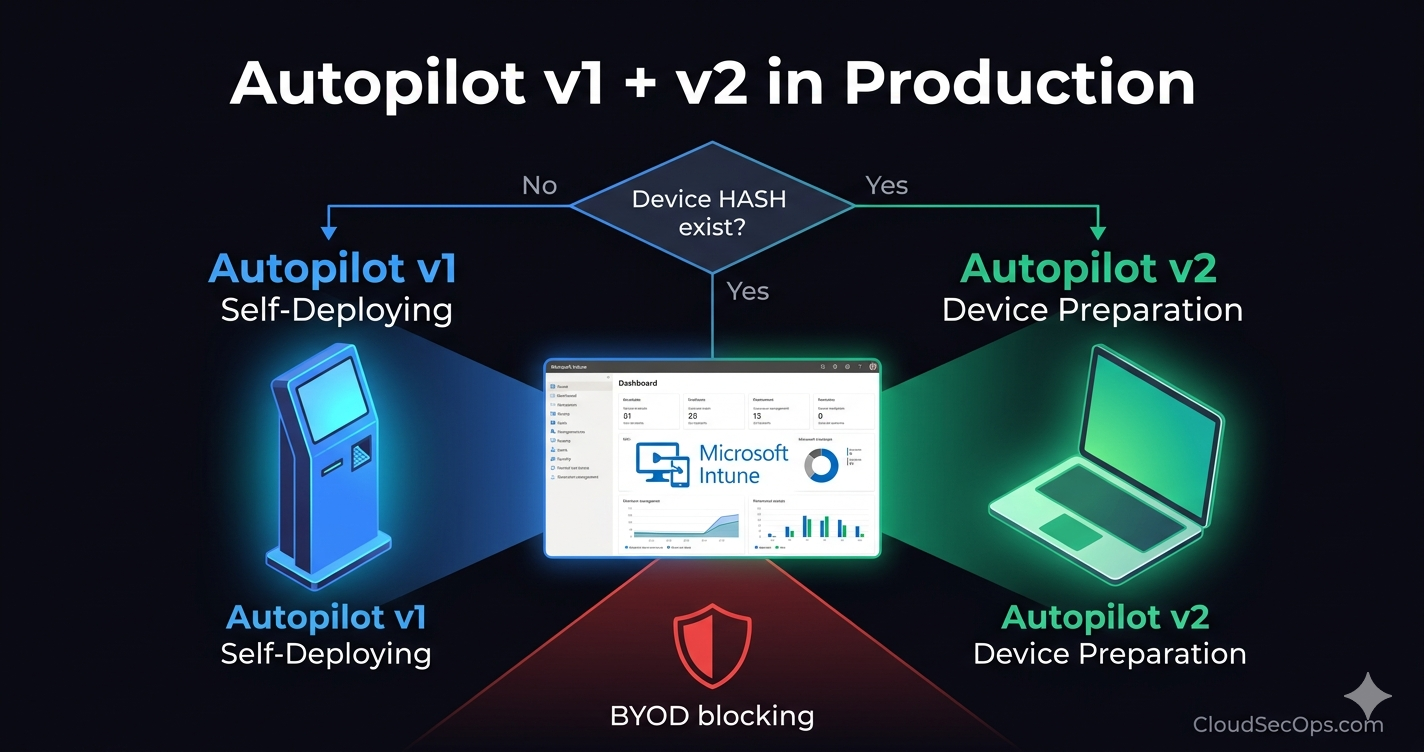
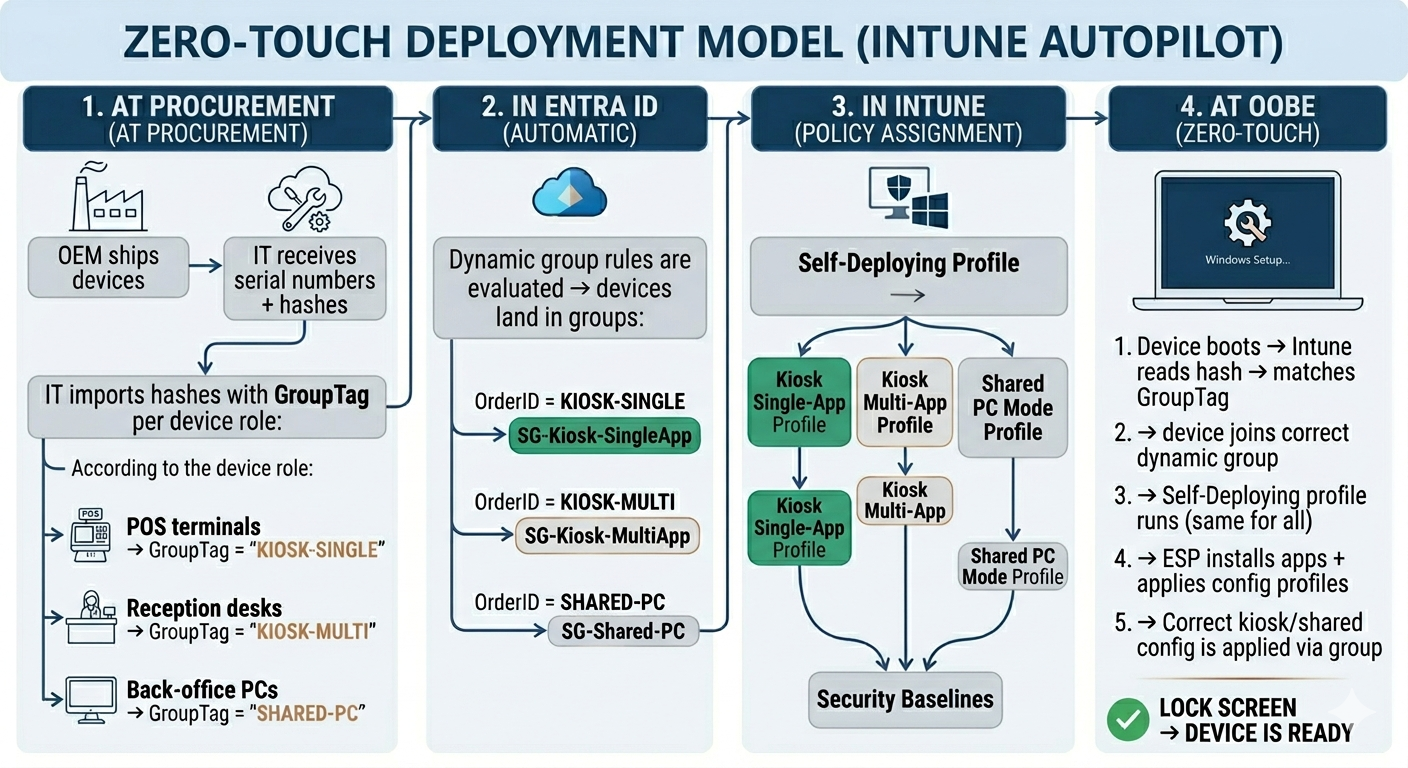
You’ve set up Autopilot v1 Self-Deploying for your kiosk devices. It works perfectly , devices boot, hit OOBE, the Self-Deploying profile takes over, and the device lands on the lock screen with the correct kiosk configuration. Zero touch. Beautiful.
Then comes the request: “We also need shared PCs in the back office. And single-app kiosks for the warehouse scanners. And multi-app kiosks for the reception desks.”
Suddenly you have four different device roles, all using Self-Deploying mode, all with different configuration profiles. The question every Intune admin asks at this point:
💡 The question : If all devices use the same Self-Deploying deployment profile and none of them have user interaction during OOBE, how does each device know which configuration it should receive?
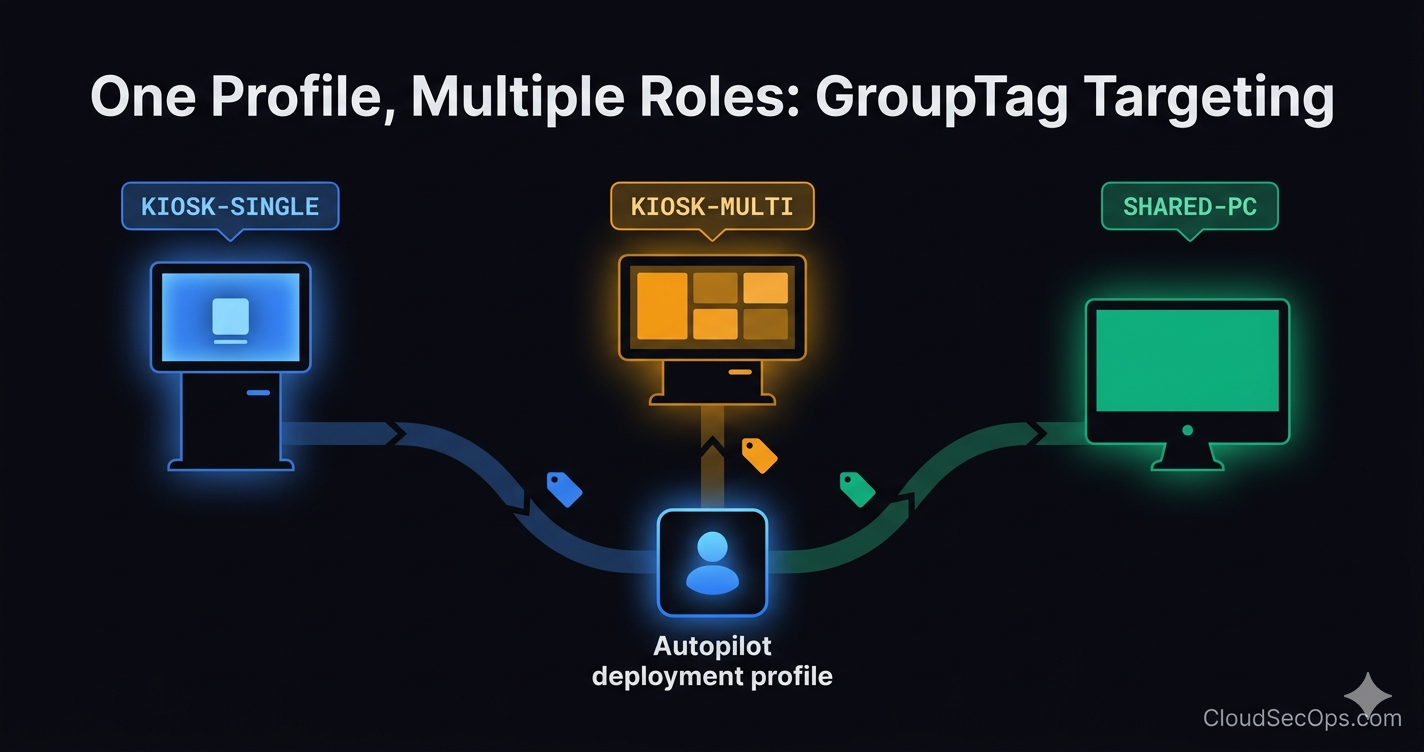
The answer is a simple but powerful mechanism that many admins overlook : the GroupTag.
The GroupTag is a string value you assign to each device at the time of hardware hash import. It’s stored as part of the device’s Autopilot identity in Intune. The key insight is that this tag becomes a property of the device object in Entra ID , specifically inside the devicePhysicalIDs attribute as an [OrderID] value.
This means you can build dynamic Entra ID device groups that automatically capture devices based on their GroupTag. And since Intune policies, apps, and configuration profiles are assigned to groups , the GroupTag effectively becomes the routing mechanism that determines what each device receives.
This is the concept that makes everything click : the Deployment Profile and the Configuration Profiles are completely independent.
| Deployment profile | Configuration profiles |
| Answers: “How does this device enroll?” Self-Deploying mode Entra ID joined Device name template Skip OOBE pages → One profile for ALL Self-Deploying devices | Answers: “What does this device do after enrollment?” Kiosk single-app (Assigned Access) Kiosk multi-app Shared PC mode Security baselines, WiFi, apps → Different profiles per device role via GroupTag |
You only need one Self-Deploying deployment profile. The differentiation happens at the configuration layer, driven by group membership, driven by the GroupTag.
The device doesn’t “choose” its profile at OOBE. Everything is predetermined by the GroupTag assigned at hash import. The OOBE is just executing a plan that was already set up.
Before importing any hash, define a clear mapping between device roles and GroupTags. This is your routing table:
| Device role | GroupTag | Dynamic group | Configuration profile |
|---|---|---|---|
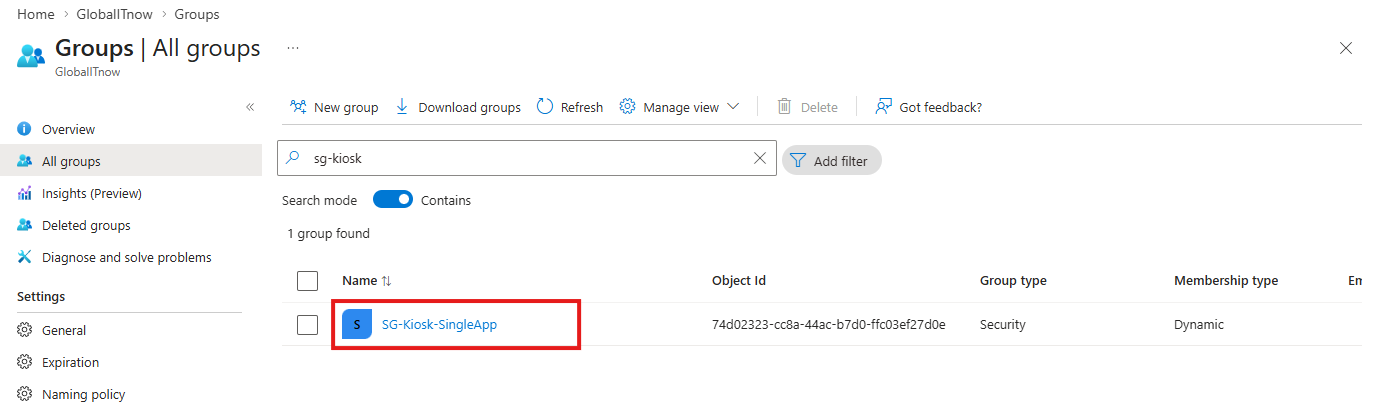
| POS kiosk (single app) | KIOSK-SINGLE | SG-Kiosk-SingleApp | Assigned Access – POS app |
| Reception kiosk (multi app) | KIOSK-MULTI | SG-Kiosk-MultiApp | Assigned Access – multi-app |
| Back-office shared PC | SHARED-PC | SG-Shared-PC | Shared PC Mode |
| Digital signage | SIGNAGE | SG-Signage | Assigned Access – signage app |
Choose GroupTag names that are short, uppercase, and descriptive. They can’t be changed after import without deleting and re-importing the device. Establish the convention before your first import.
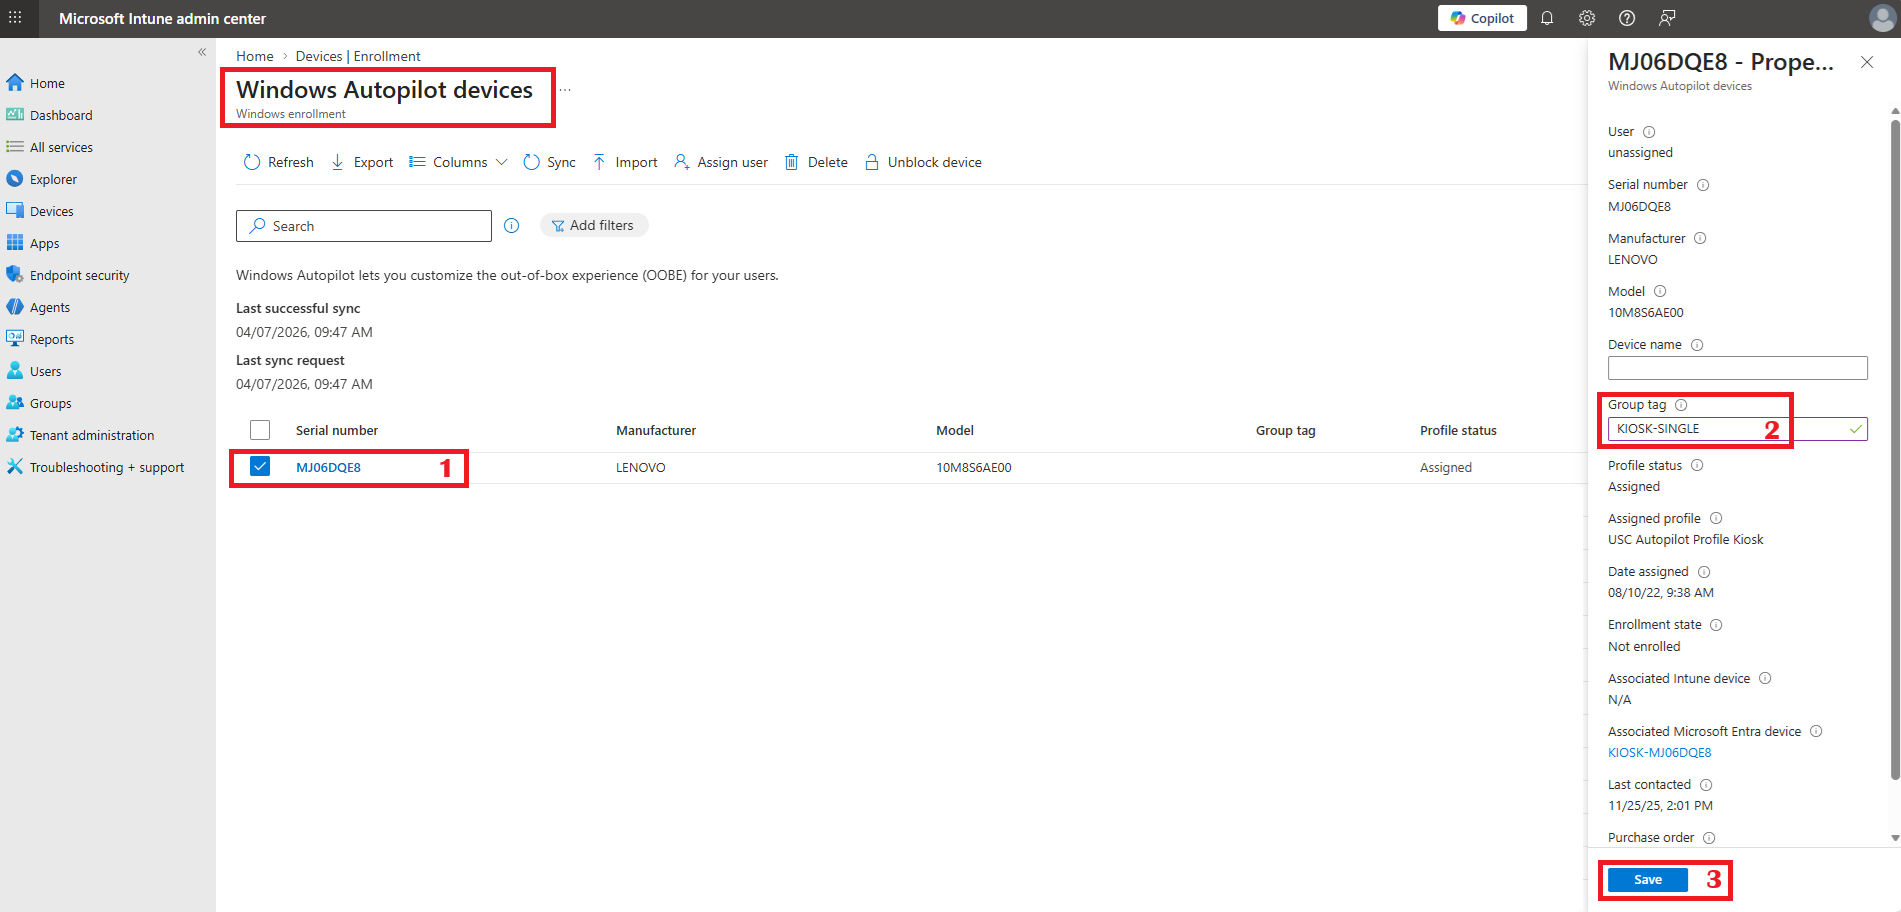
When importing hardware hashes , whether via CSV upload in the Intune portal, through the OEM portal (Dell, Lenovo, HP), or via the Get-WindowsAutopilotInfo script , assign the correct GroupTag to each device based on its intended role.
Via CSV: The CSV format includes a Group Tag column. Populate it with the tag corresponding to the device’s role. You can import devices in batches , one CSV per role, or a single CSV with mixed tags.
Via OEM: Most OEMs (Dell TechDirect, Lenovo RLPA, HP Partner First) allow you to specify a GroupTag at the time of order. The OEM imports the hashes directly into your Intune tenant with the tag pre-assigned. This is the ideal approach , zero manual CSV handling.
Via script: When using Get-WindowsAutopilotInfo -Online, use the -GroupTag parameter to assign the tag at collection time.
Via Intune portal : You can manually enter GroupTag directly from Intune Admin Portal.
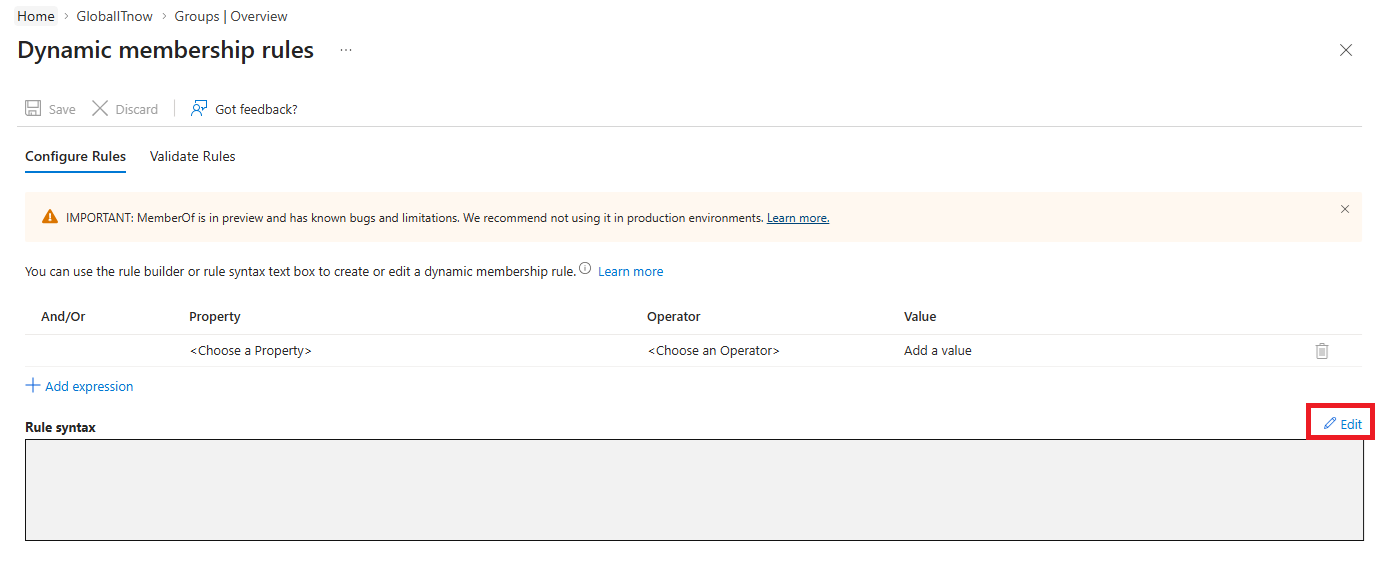
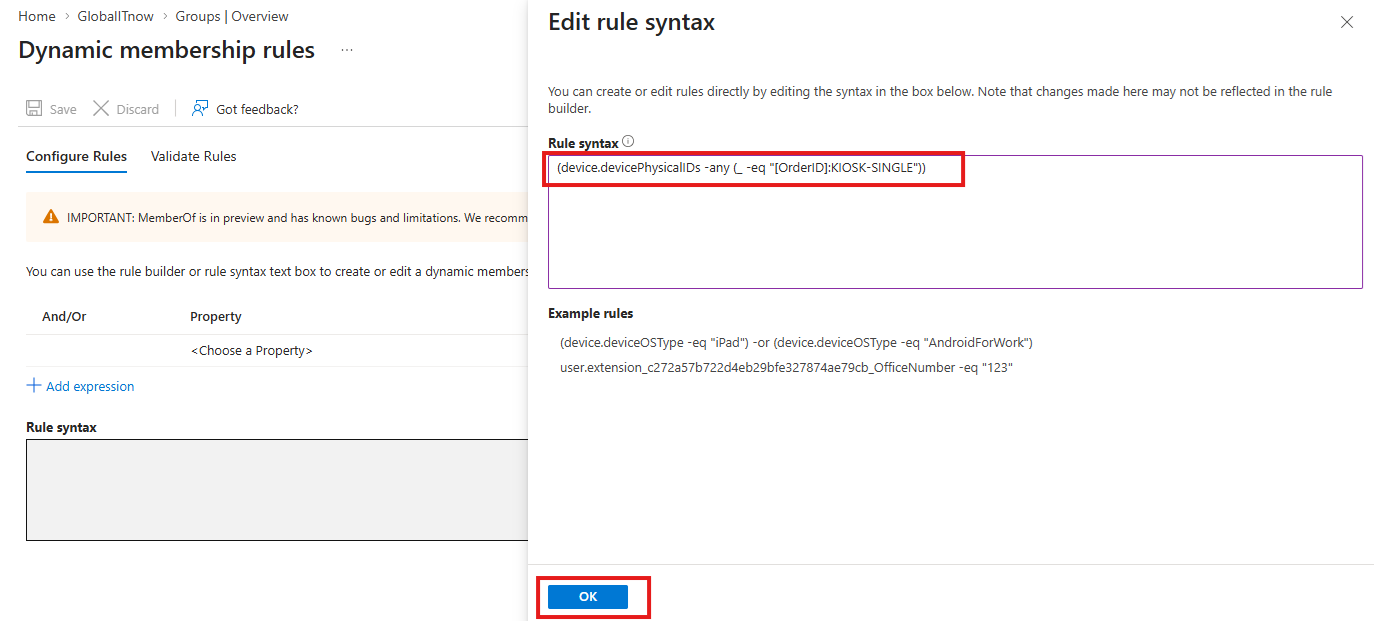
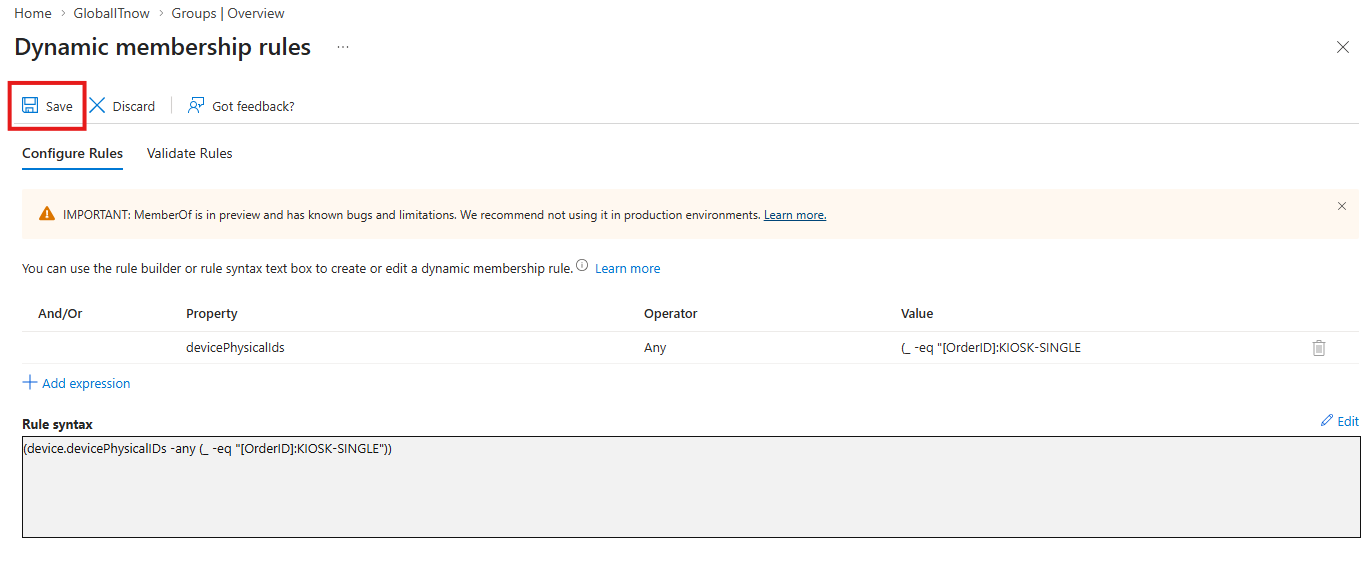
For each GroupTag, create a dynamic Entra ID device group with a membership rule that matches the tag. The rule syntax is :
| Group name | Dynamic membership rule |
|---|---|
| SG-Kiosk-SingleApp | (device.devicePhysicalIDs -any (_ -eq "[OrderID]:KIOSK-SINGLE")) |
| SG-Kiosk-MultiApp | (device.devicePhysicalIDs -any (_ -eq "[OrderID]:KIOSK-MULTI")) |
| SG-Shared-PC | (device.devicePhysicalIDs -any (_ -eq "[OrderID]:SHARED-PC")) |
| SG-Signage | (device.devicePhysicalIDs -any (_ -eq "[OrderID]:SIGNAGE")) |
In the dynamic membership rule, the GroupTag is referenced via the
[OrderID]property insidedevicePhysicalIDs. This is not a bug, it’s how Microsoft mapped the attribute. Don’t search for[GroupTag]in the rule, it won’t work. The correct prefix is always[OrderID].

Click Edit to Enter device Tagexpression.
if you have Any issue with the rule creation, you can watch this video : https://www.youtube.com/watch?v=4d2MOQk9ejc

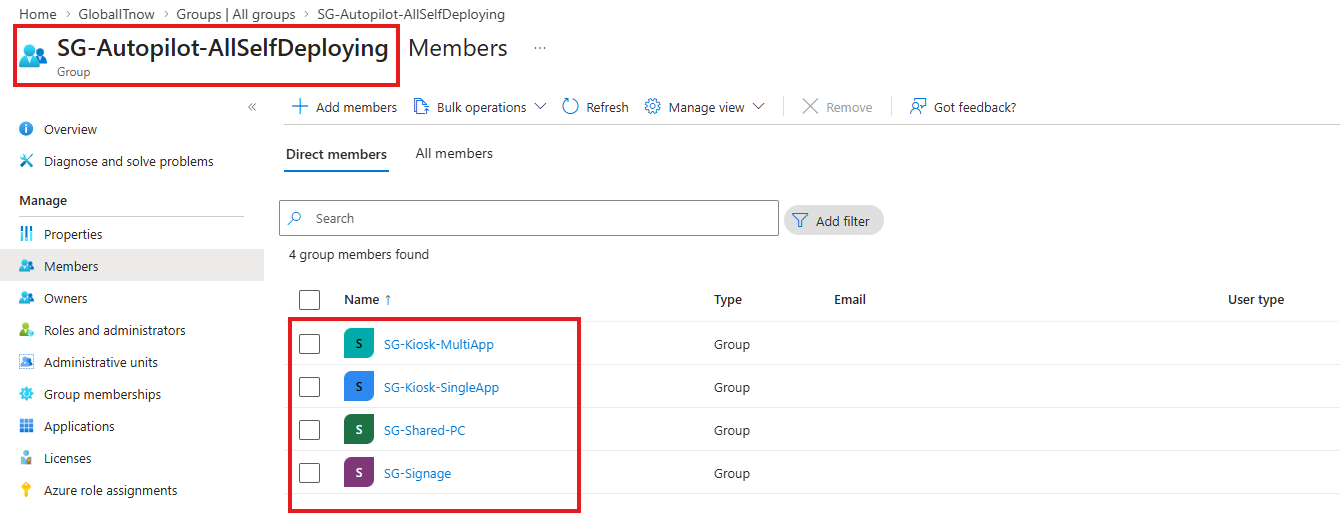
Create a parent group that captures all Self-Deploying devices (for the shared deployment profile and common security baselines).
The new group “
SG-Autopilot-AllSelfDeploying” should contain all dynamic device groups : “SG-Kiosk-SingleApp“, “SG-Kiosk-MultiApp” , “SG-Shared-PC” , “SG-Signage“
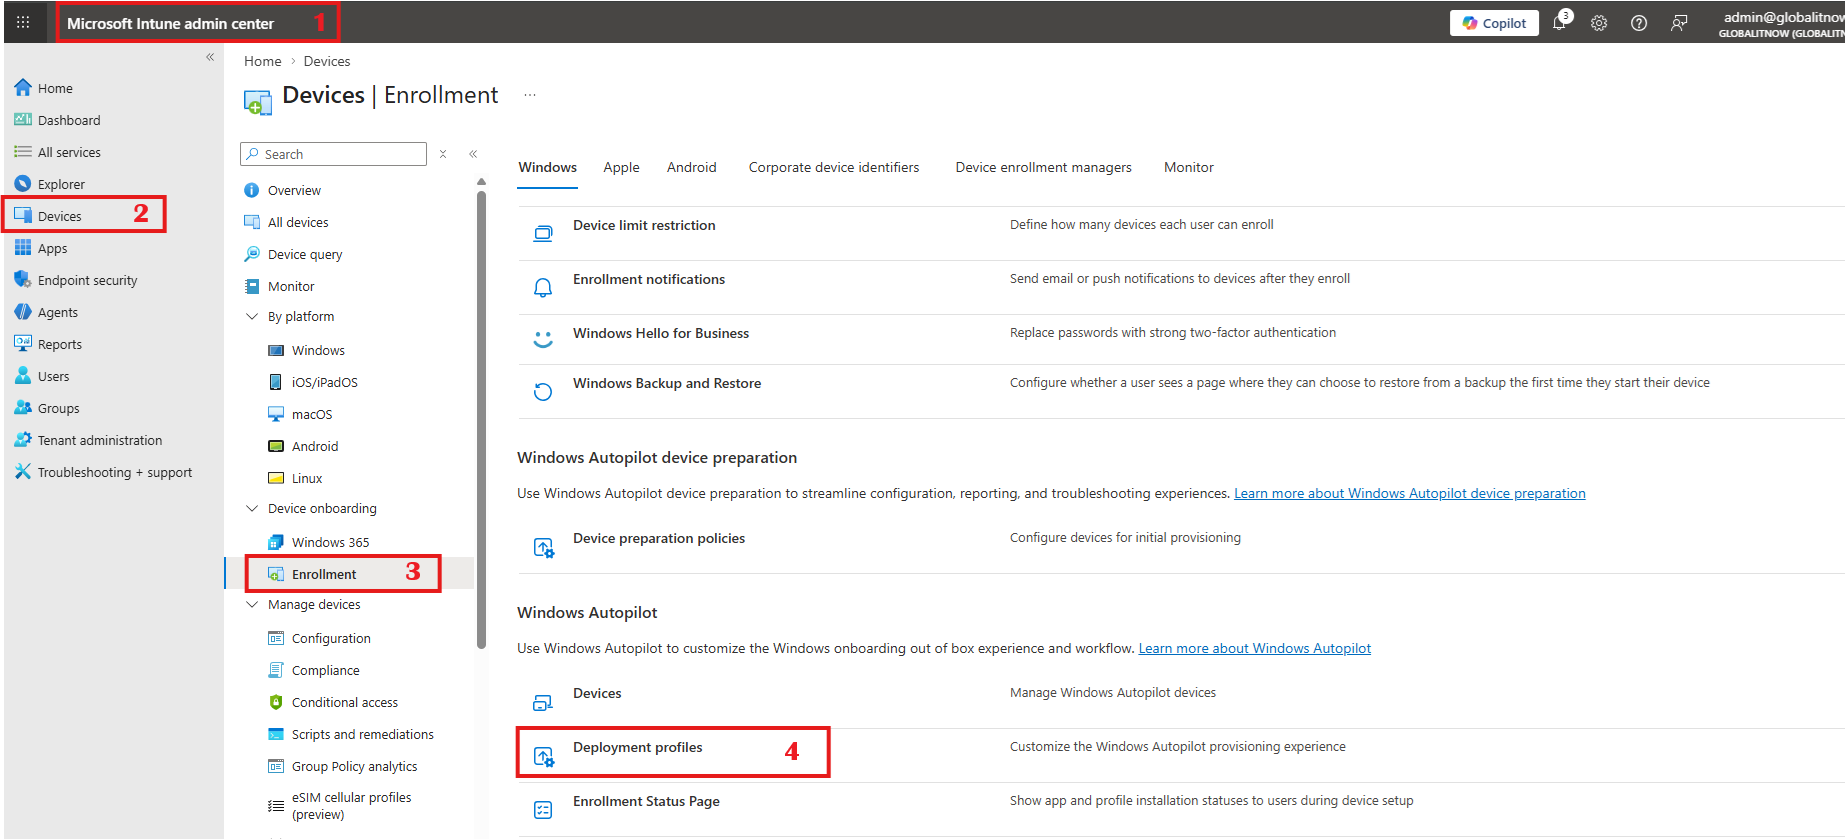
In the Intune admin center : Devices → Enrollment → Windows → Deployment profiles → Create profile → Self-Deploying.
| Setting | Value |
|---|---|
| Deployment mode | Self-Deploying |
| Join type | Entra ID joined |
| Apply device name template | Yes – %SERIAL% |
| Language | Operating system default |
| Skip keyboard | Yes |
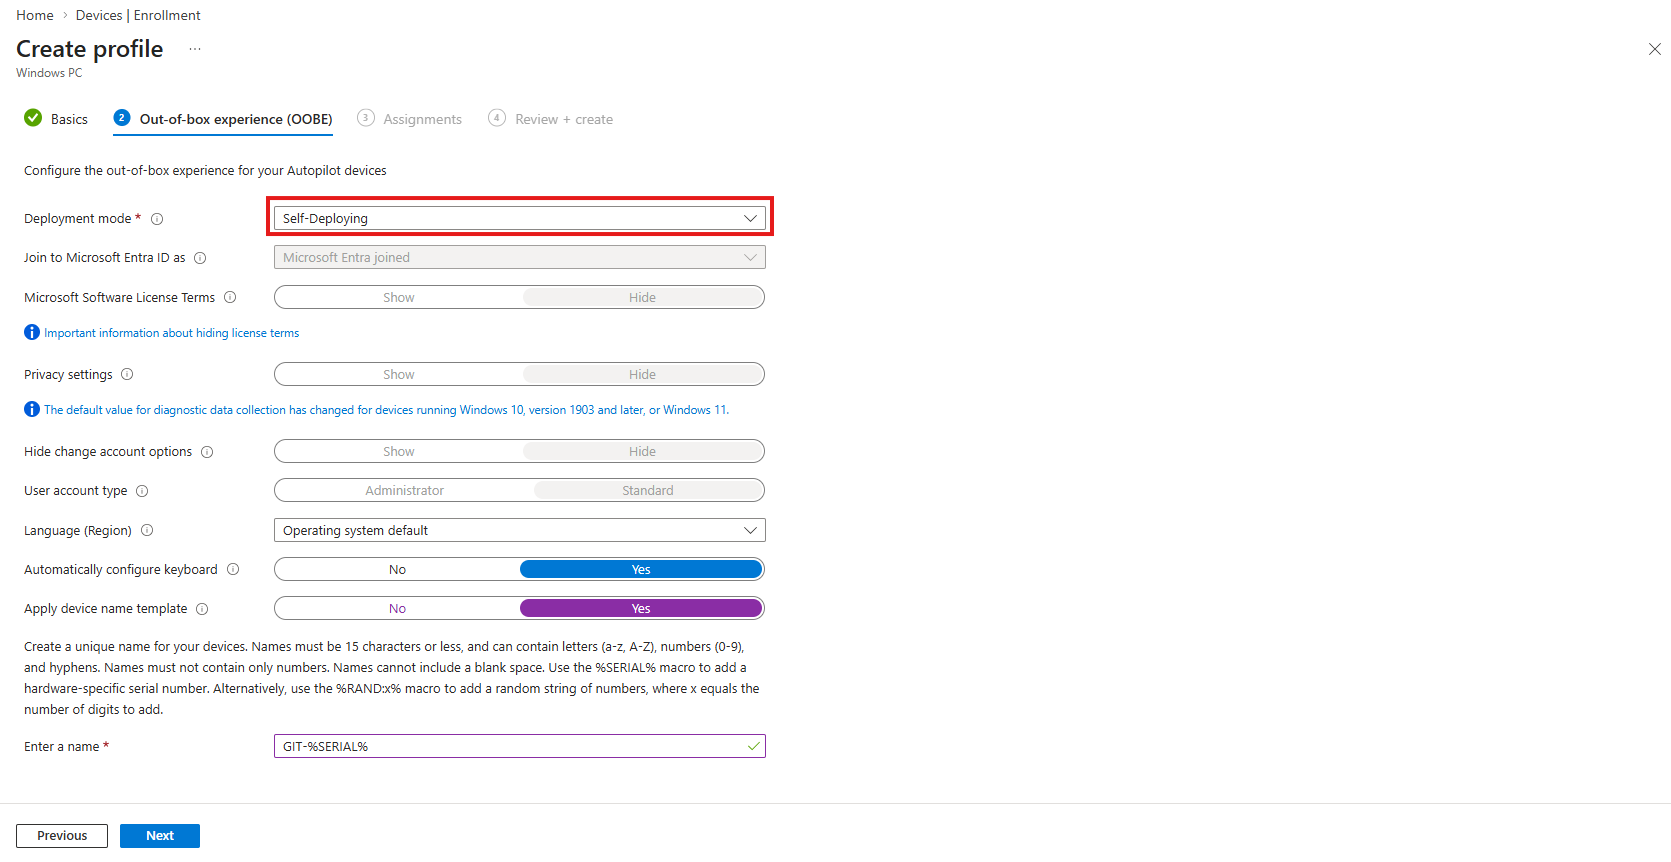
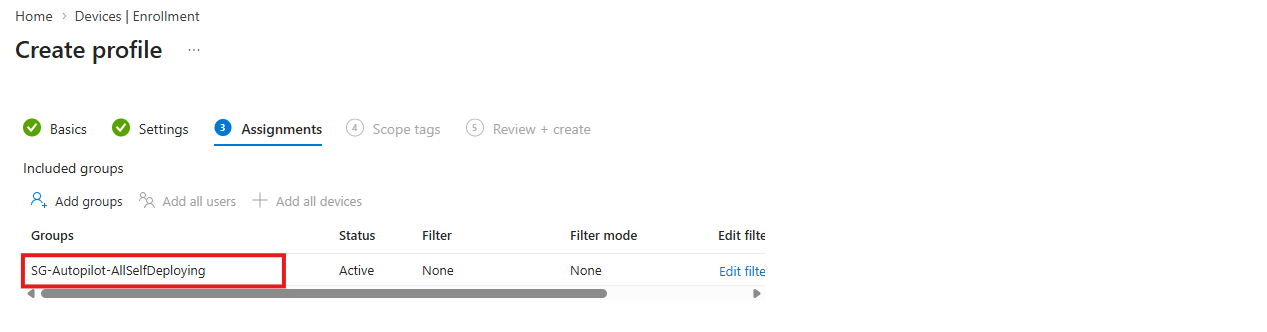
SG-Autopilot-AllSelfDeploying“. Every Self-Deploying device uses this same profile. The differentiation comes next.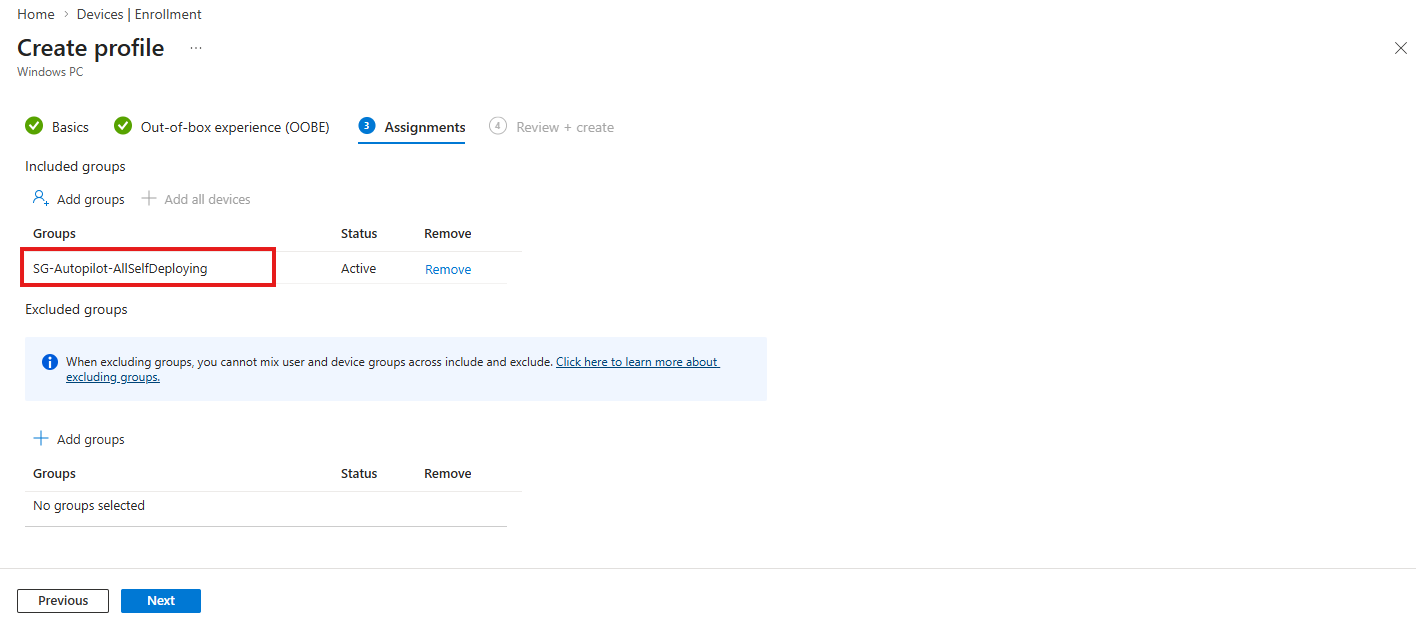
New Autopilot Self Deployment Profile Created successfuly.

This is where the GroupTag-based targeting does its magic. Each device role gets its own configuration profile, assigned to its specific dynamic group:
| Single-app kiosk | Multi-app kiosk | Shared PC |
| → SG-Kiosk-SingleApp | → SG-Kiosk-MultiApp | → SG-Shared-PC |
| Assigned Access: single UWP/Win32 app Auto-logon account USB blocked Camera disabled | Assigned Access: app allow-list Custom Start layout Edge in kiosk mode USB blocked | Shared PC Mode enabled Cleanup on sign-out No guest access Local storage restricted |
Security baselines (Defender, BitLocker, Firewall, ASR, LAPS, WiFi) are assigned to the parent group
SG-Autopilot-AllSelfDeploying, they apply to every Self-Deploying device regardless of role.
For Configuration Profiles check this links :
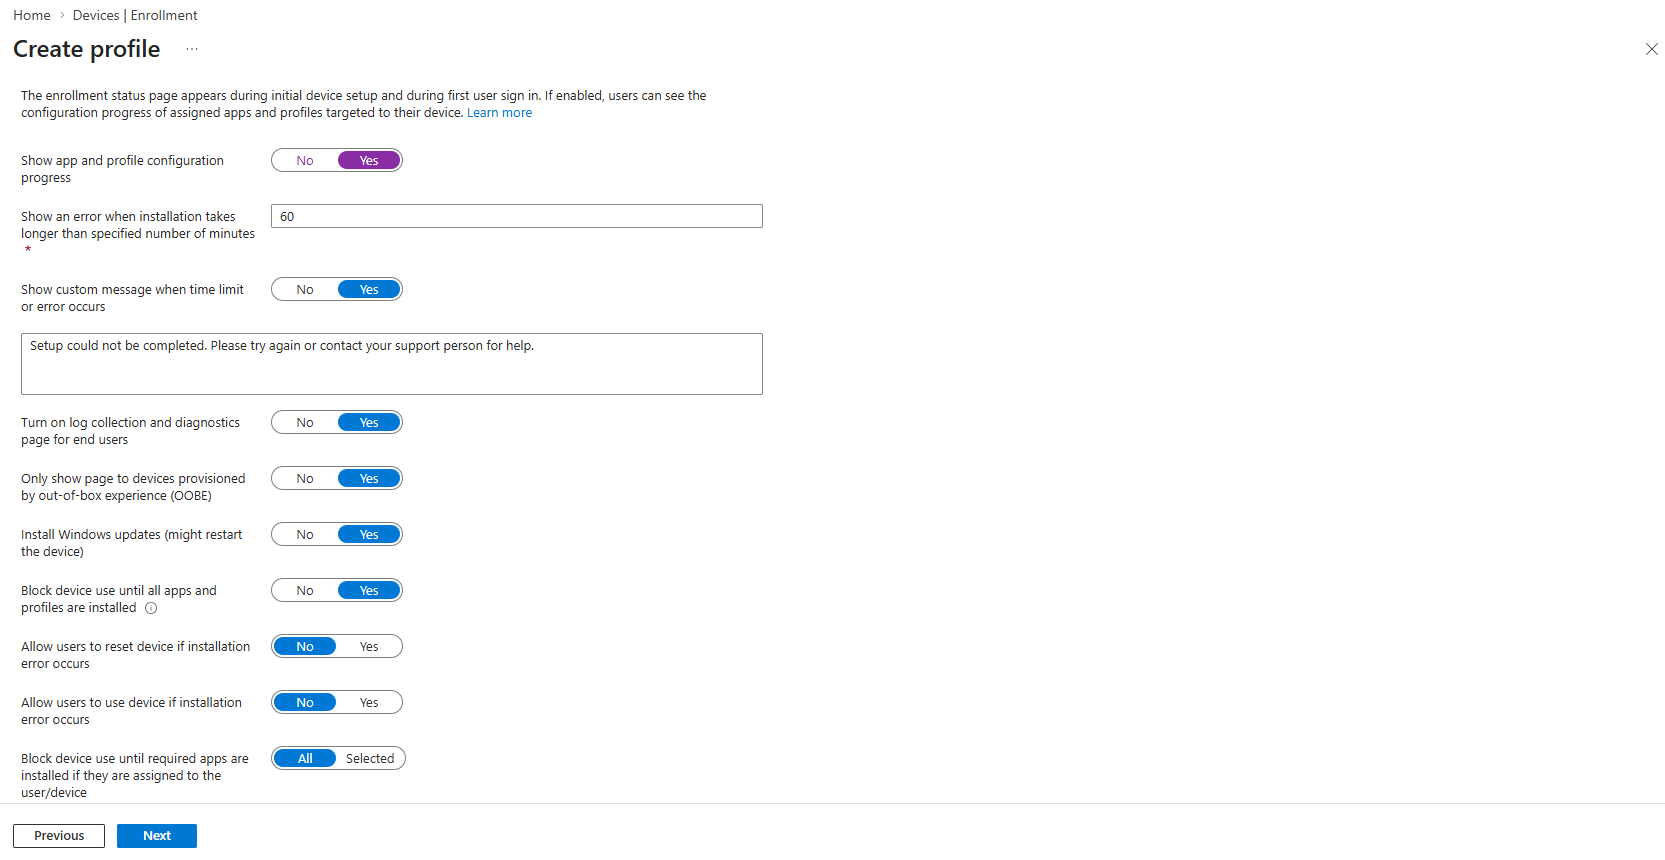
Create a custom Enrollment Status Page assigned to SG-Autopilot-AllSelfDeploying. Since Self-Deploying has no user affinity, only the Device Setup phase runs. There is no Account Setup phase.
| Setting | Value |
|---|---|
| Show app and profile progress | Yes |
| Timeout (minutes) | 60 |
| Block device use until all required apps install | Yes |
| Allow reset on failure | Yes |
KIOSK-SINGLE, KIOSK-MULTI, KIOSK-PHARMACY , not POS, RECEPTION, PHARMACY. The common KIOSK- prefix lets you build a parent group with -startsWith that captures all kiosk variants automatically.%SERIAL% as the name template, then apply a device rename profile per role group (e.g., KIOSK-POS-%SERIAL:8% for single-app, SHARED-%SERIAL:8% for shared PCs). This gives you human-readable device names in Intune.The GroupTag is one of the most underutilized features in Windows Autopilot. It transforms a single Self-Deploying deployment profile into a multi-role provisioning engine , capable of differentiating between kiosks, shared PCs, digital signage, and any other device type you can think of, all without a single user interaction at OOBE.
The architecture is elegant in its simplicity: one deployment profile defines how devices enroll. GroupTags and dynamic groups define what they become. Adding a new device role is three steps. Scaling from 5 stores to 500 stores changes nothing in the configuration , you just import more hashes with the right tags.
The next time someone asks “how does the device know which profile to get ?“, the answer is simple: it was decided the moment the GroupTag was assigned. The OOBE is just executing the plan.
Thanks