Explore practical guides and tools for Microsoft 365, Azure, and PowerShell. Enhance your cloud security and admin skills with expert insights and automation tips.
Explore practical guides and tools for Microsoft 365, Azure, and PowerShell. Enhance your cloud security and admin skills with expert insights and automation tips.
Mastering Android Enterprise Enrollment in Microsoft Intune: A Step-by-Step Technical Guide
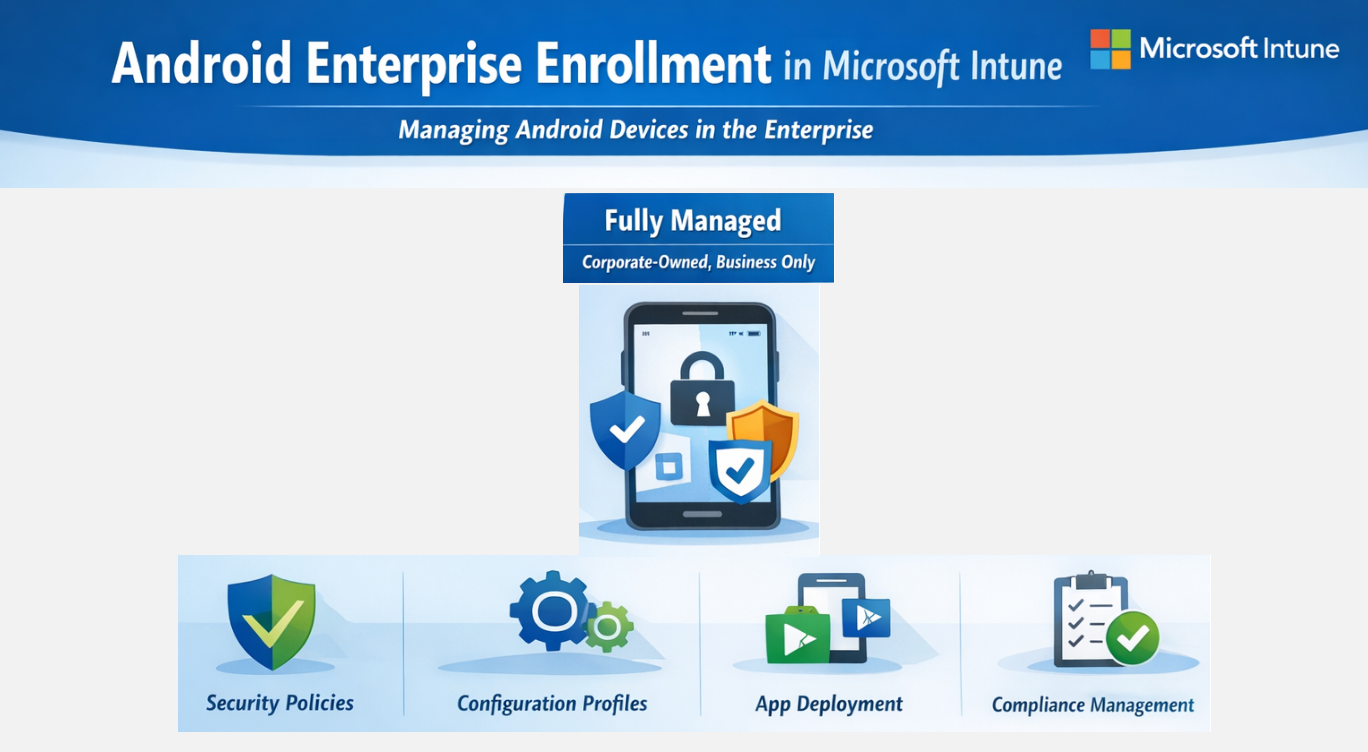
Managing Android devices in an enterprise environment requires a balance between security, user experience, and administrative control. Android Enterprise, integrated with Microsoft Intune, provides a modern and secure framework to manage corporate and BYOD Android devices.
In this article, I will walk through the end-to-end configuration of Android Enterprise enrollment in Microsoft Intune, explaining each step as if screenshots are included for better visibility and understanding. This guide is intended for system administrators, Intune engineers, and security professionals looking to implement or review Android device management best practices.
Prerequisites
Before starting, ensure the following requirements are met:
Microsoft Intune subscription (part of Microsoft 365)
Global Administrator or Intune Administrator permissions
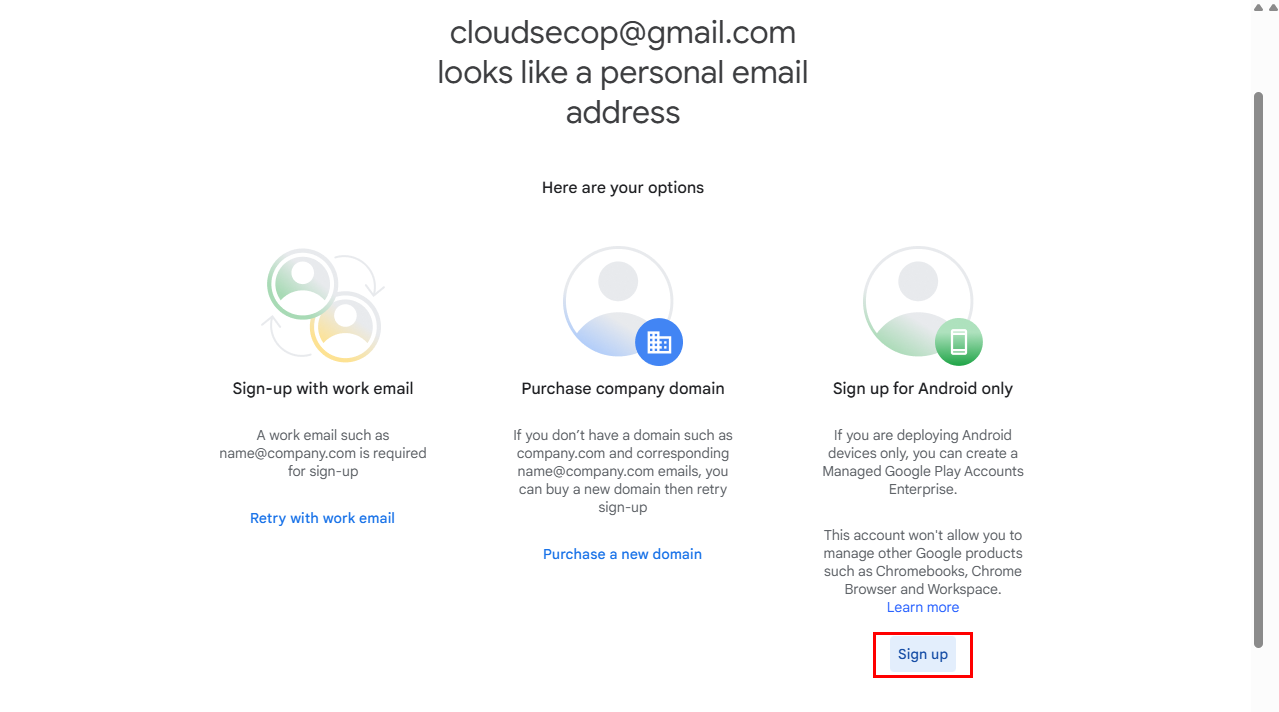
Google account (used to bind Android Enterprise)
Android devices running Android 9.0 or later
Network access to Google and Microsoft services
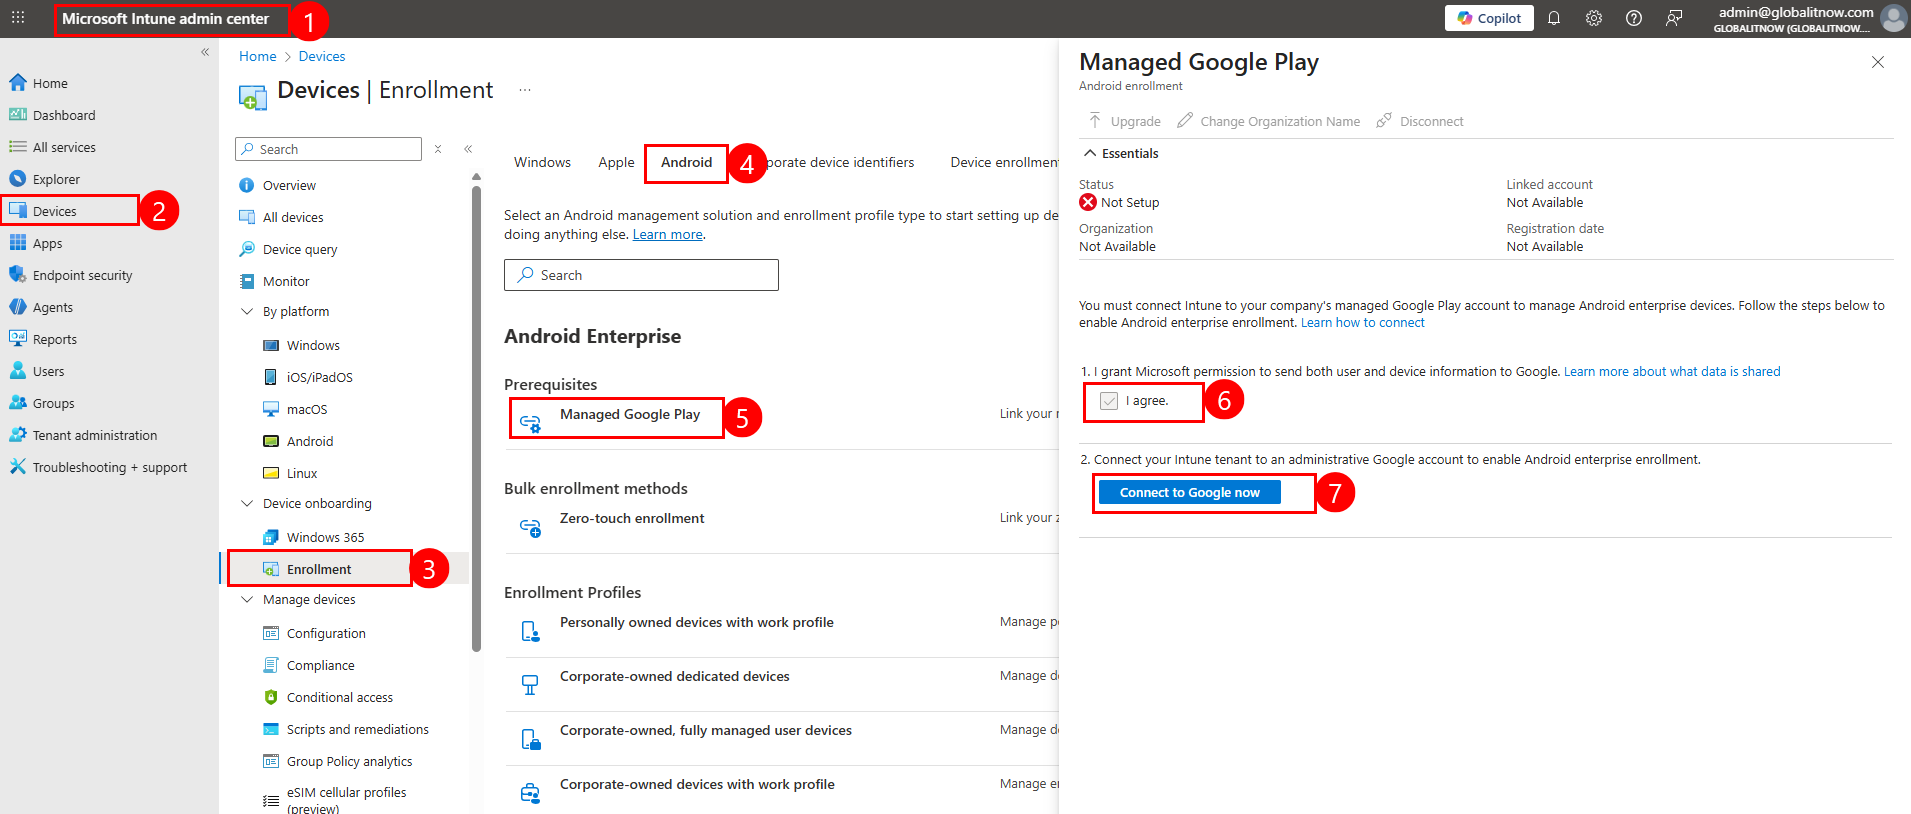
Step 1 : Enable Android Enterprise in Intune
Sign in to the Microsoft Intune Admin Center.
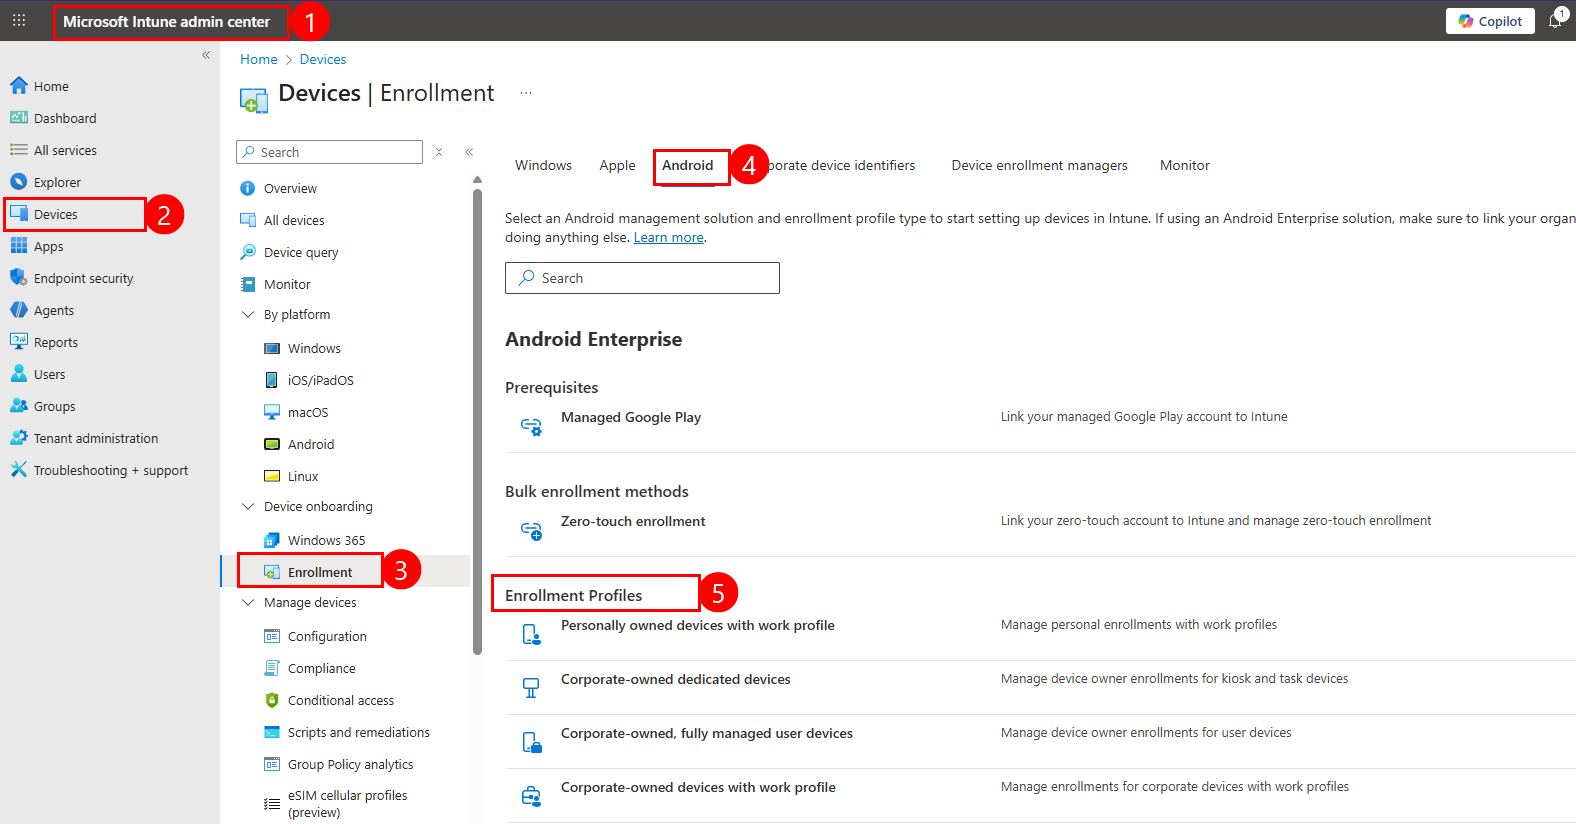
Navigate to Devices → enrollment → Android
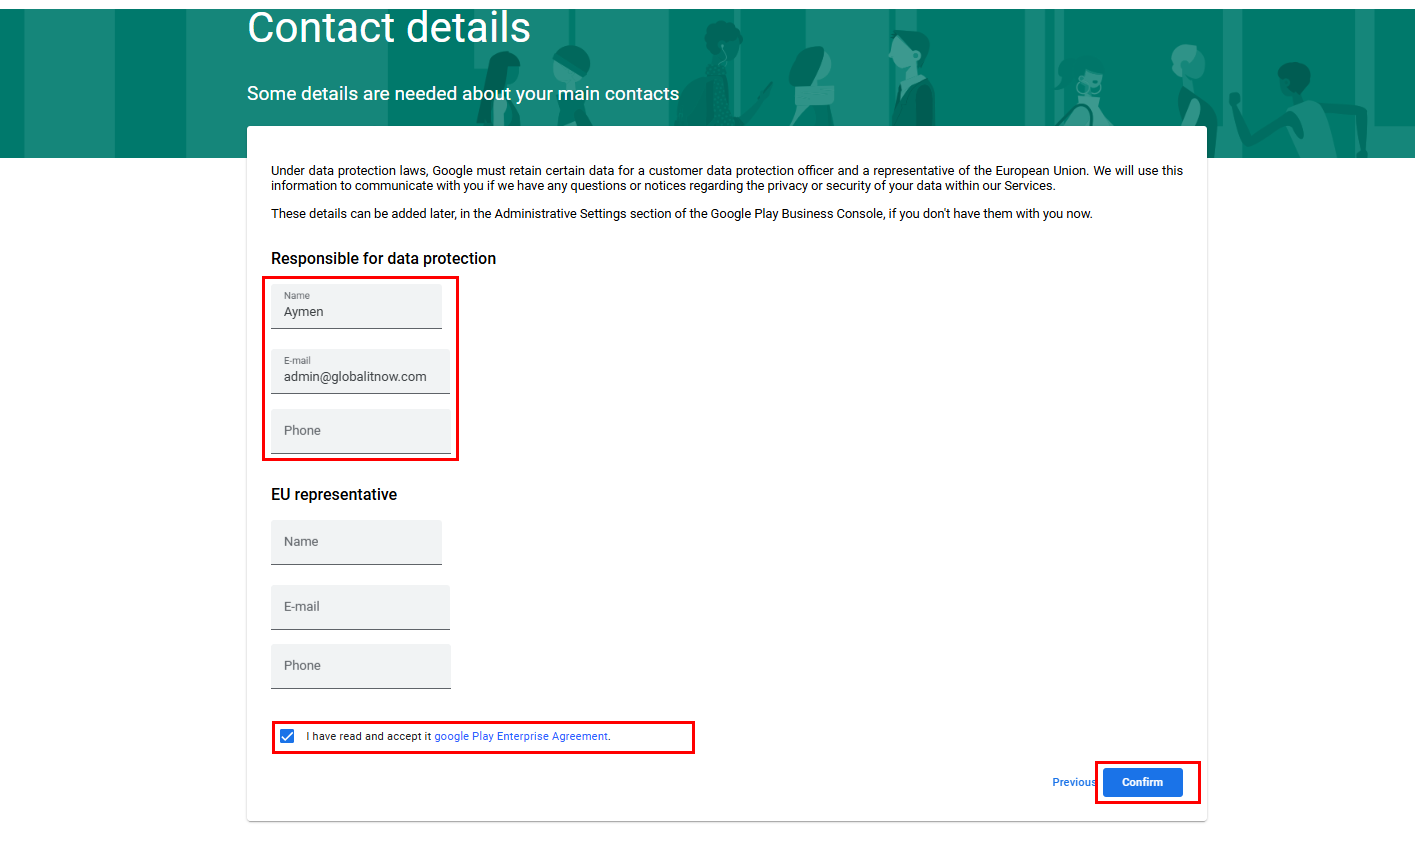
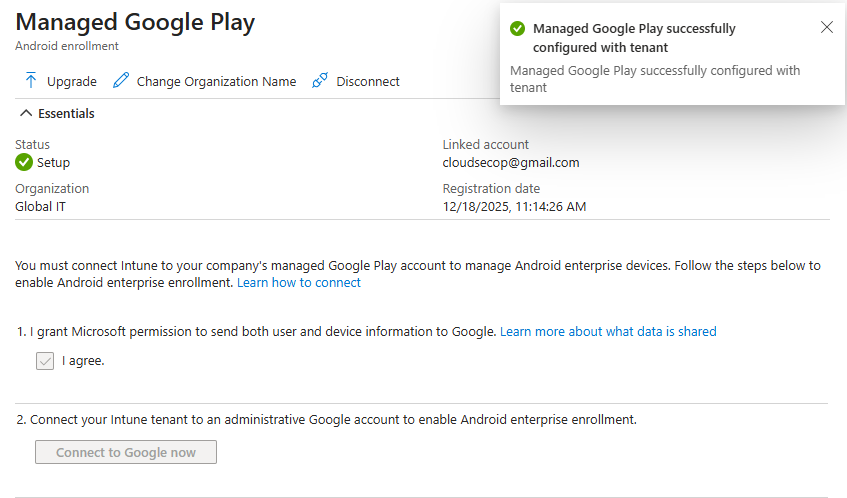
Select Managed Google Play.
Select “I agree” option
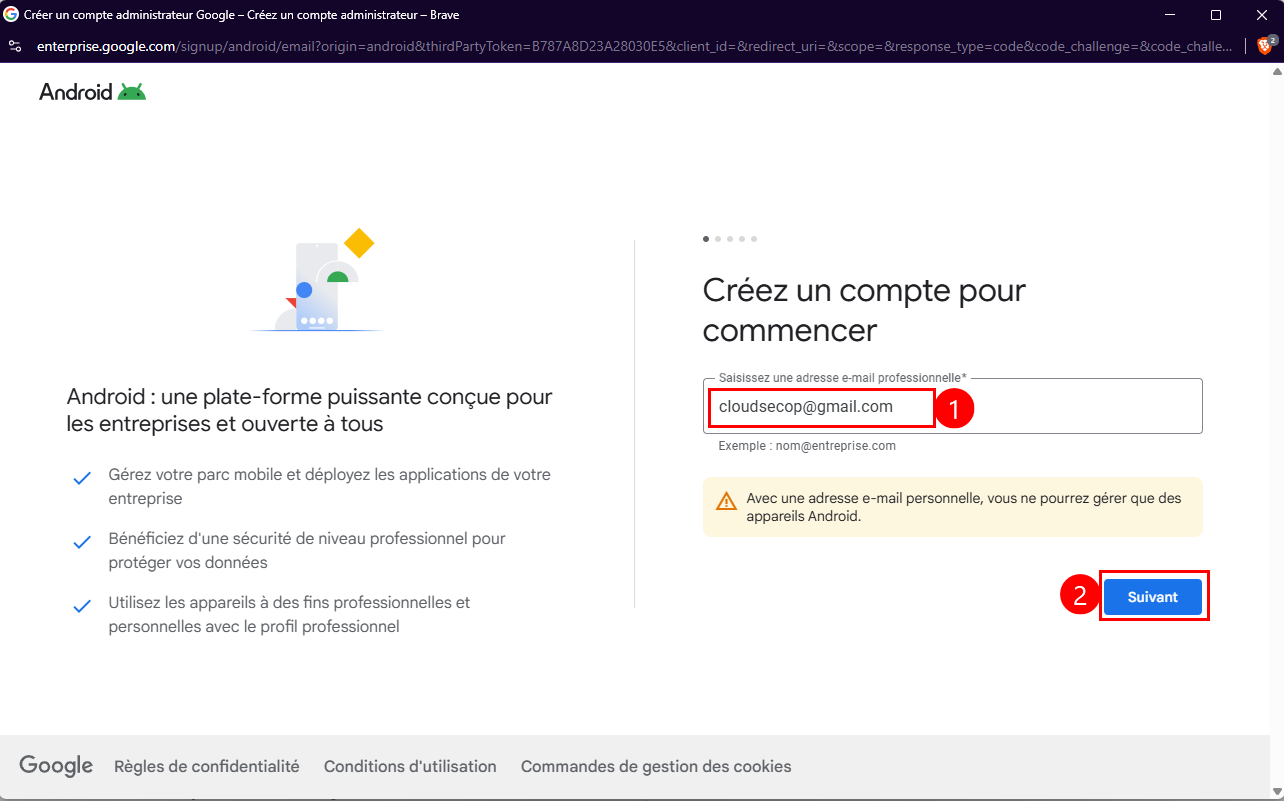
Click “Connect to Google now” to open the Google Play Android Enterprise portal.
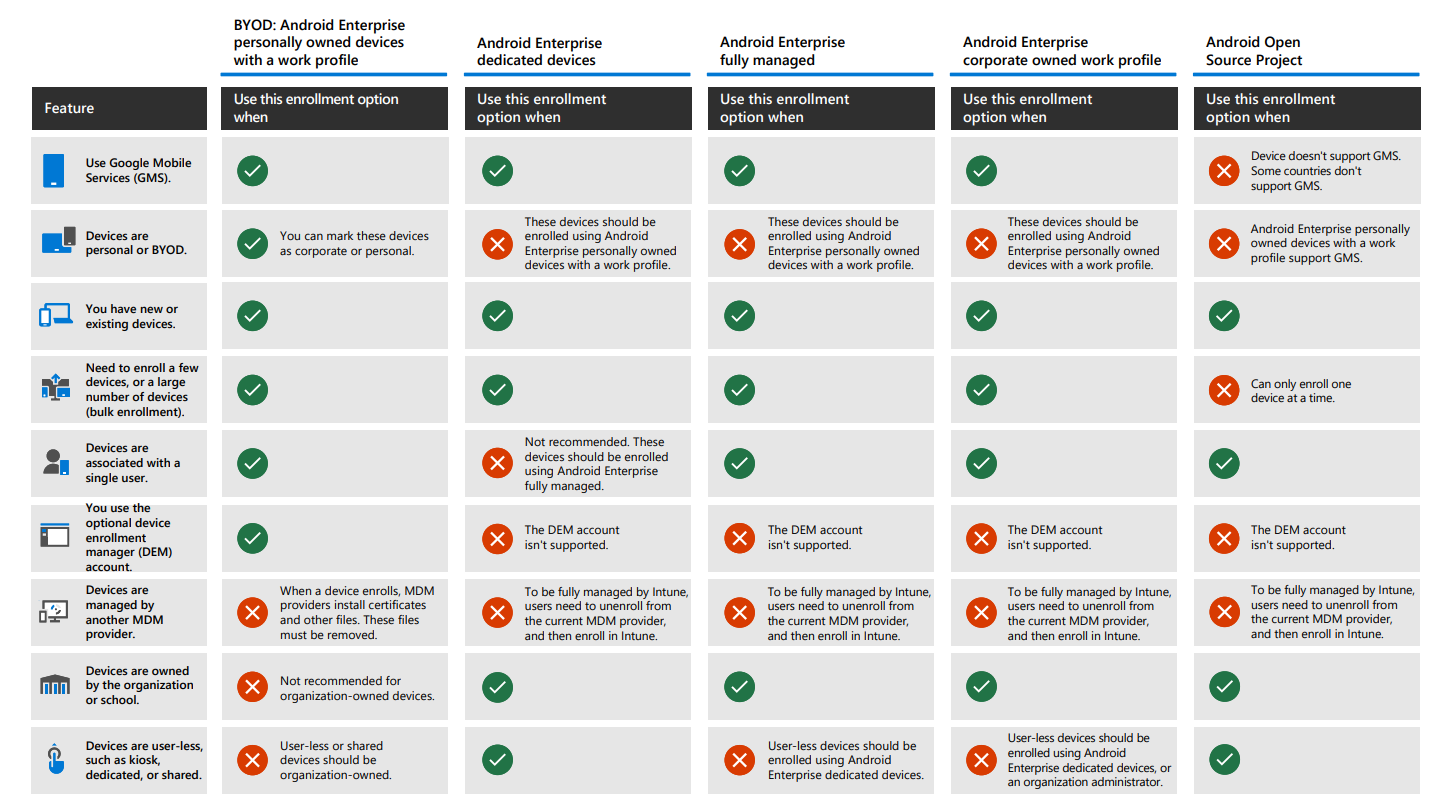
Once Android Enterprise is enabled, Intune supports multiple enrollment scenarios:
Fully Managed (Corporate-owned, fully managed user devices) : This profile is designed for company-owned devices used exclusively for work purposes.
Work Profile (BYOD : Personally owned devices with work profile) : This profile applies to personally owned devices.
Corporate-Owned Work Profile (Corporate-owned devices with work profile) : Devices are owned by the organization but allow both work and personal usage.
Dedicated Devices (Kiosk mode : Corporate-Owned Dedicated Devices) : This profile is intended for devices dedicated to a specific task, often without a signed-in user.
Here are available scenarios to enroll Android devices in Microsoft Intune :
Select One Enrollment Profile from available profiles list (in my case I’ll go with : Fully Managed (Corporate-owned, fully managed user devices)).
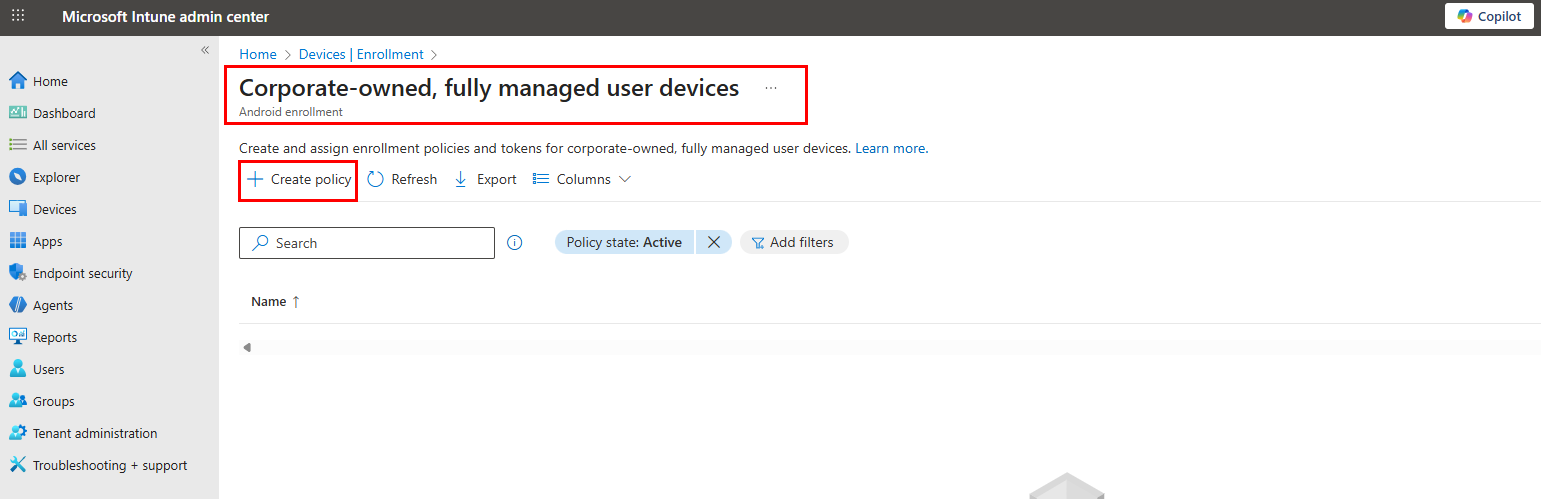
As I said, in my case I’ll go with : Fully Managed (Corporate-owned, fully managed user devices).
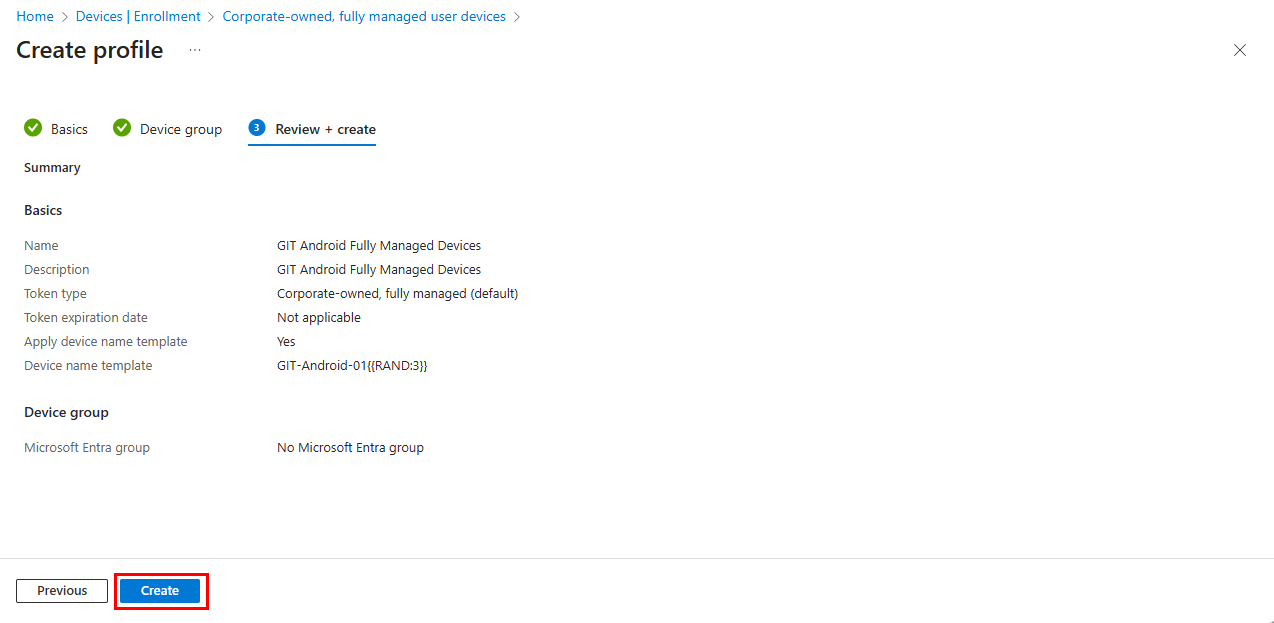
Under “Corporate-owned, fully managed user devices” , select “Create Policy“.
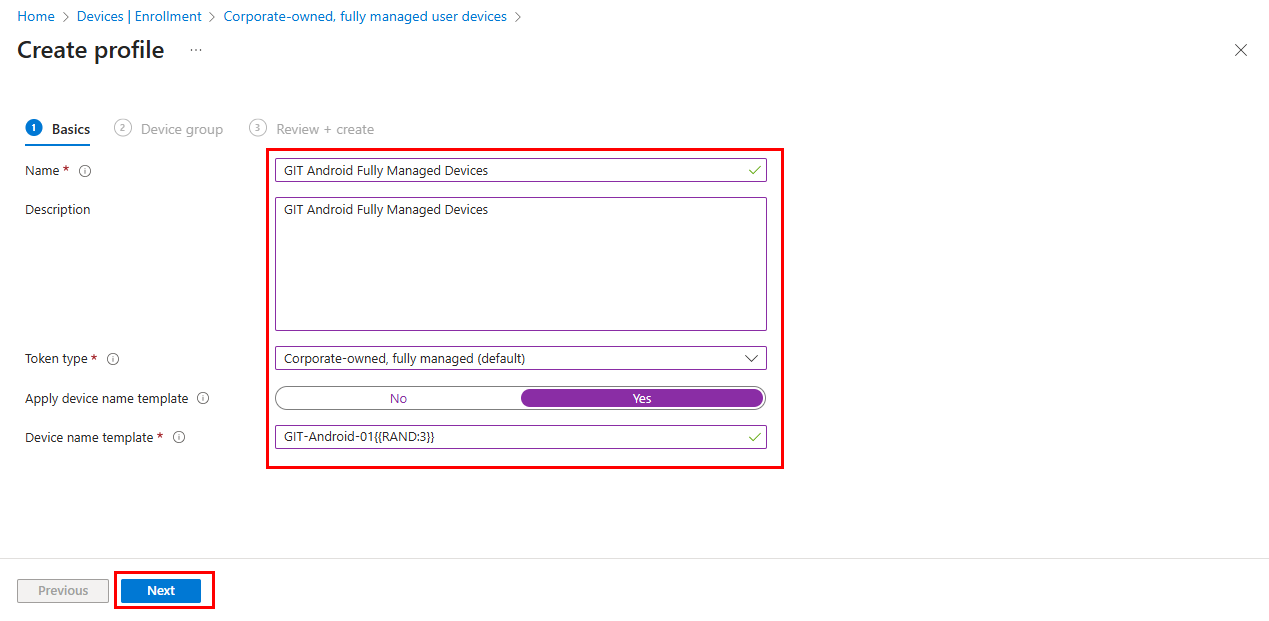
Enter the profile name, description, token type, and device name template (if necessary).
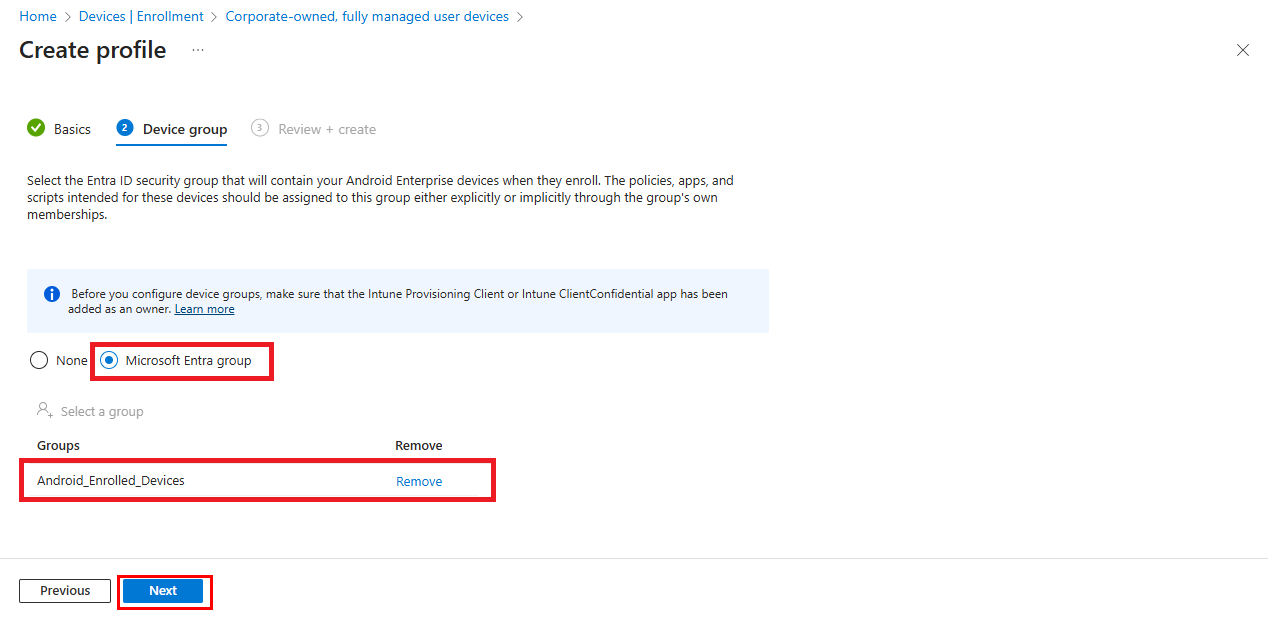
Select “Entra Id Group” (this group will be used to group new enrolled devices).
Click Next.
Click Create to finish profile creation.
Now the profile is created, as you can see here.
Enroll new Android device
There are several methods for enrolling a new Android device (through the Intune Company Portal app, QR code scan, or other methods), but I prefer the QR code scan method.
Scanning the QR code requires that the Android device be started after a factory reset.
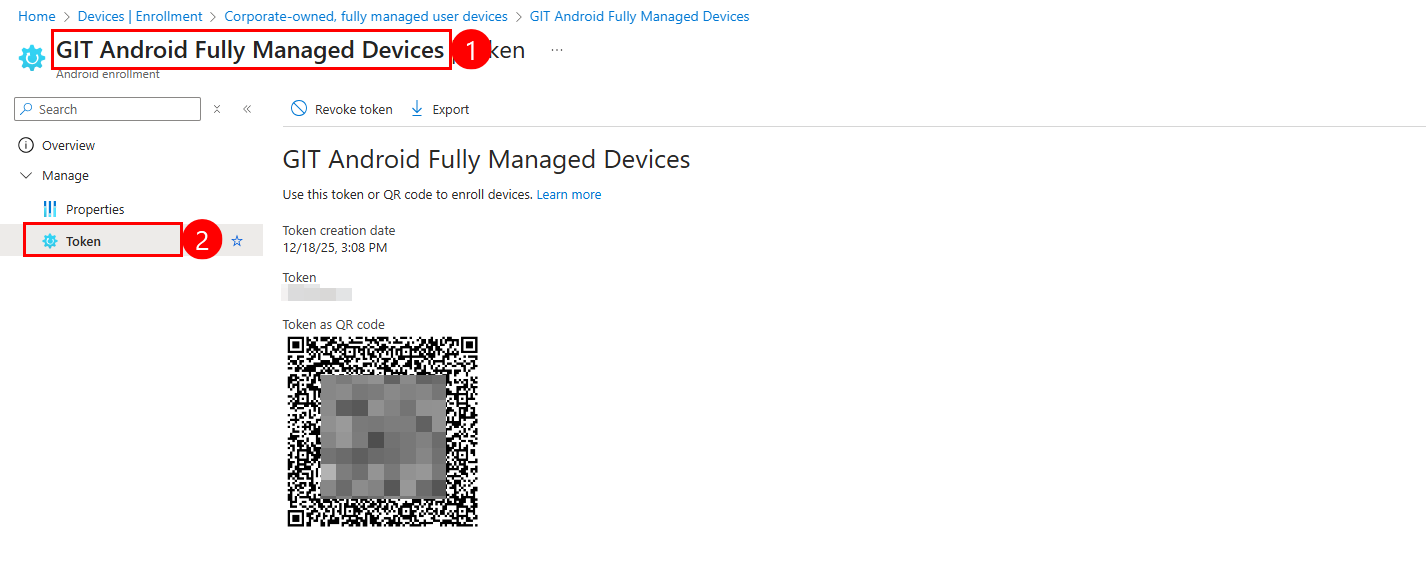
First of all, let’s open recently created Enrollment profile
Select the Token menu.
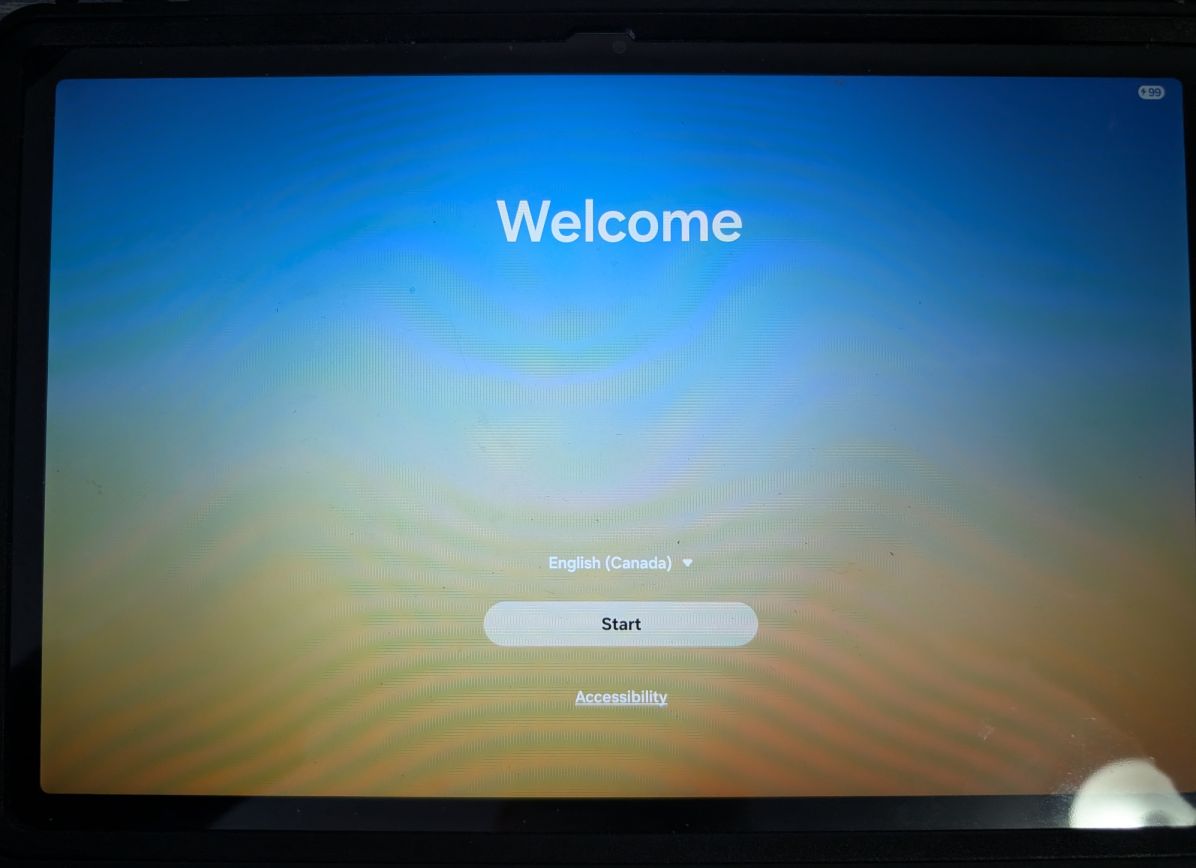
Now let’s go back to our Android device (it’s an Android tablet) after performing a factory reset. This is the startup window that we see.
In this window, tap anywhere on the main screen 6 times to launch the QR code reader.
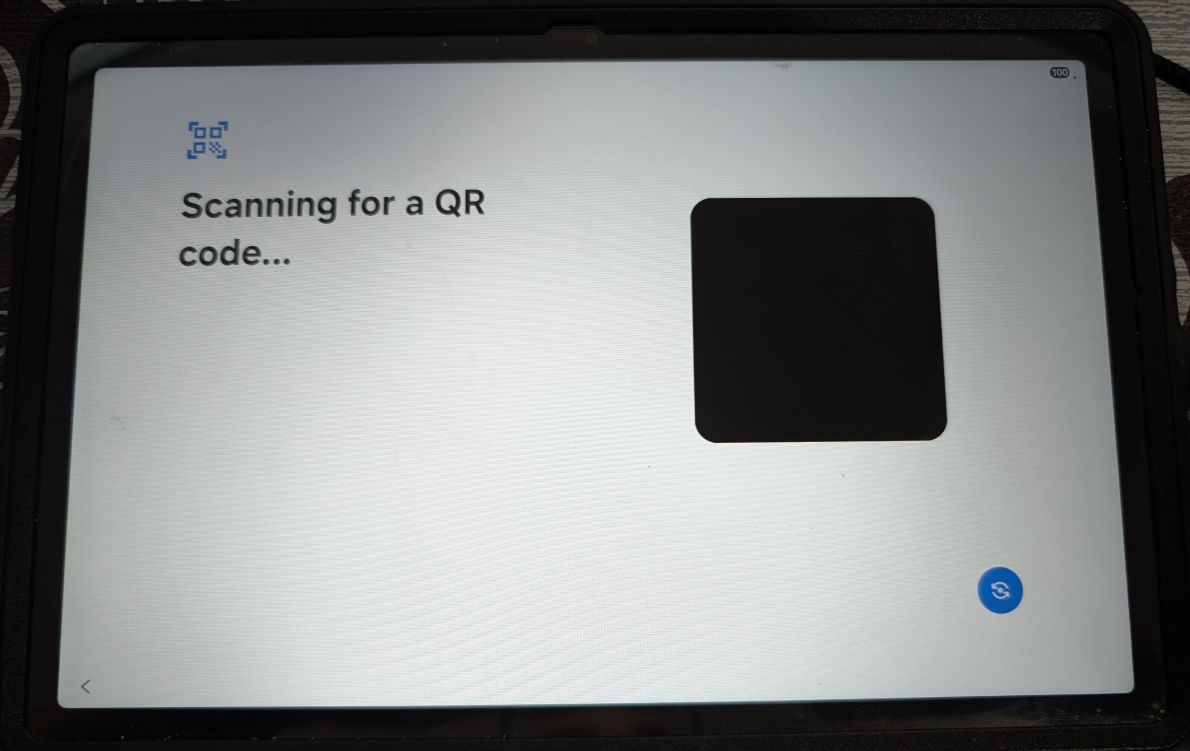
A QR code reader window appears to scan the QR code found in the Token menu that we prepared in the first step.
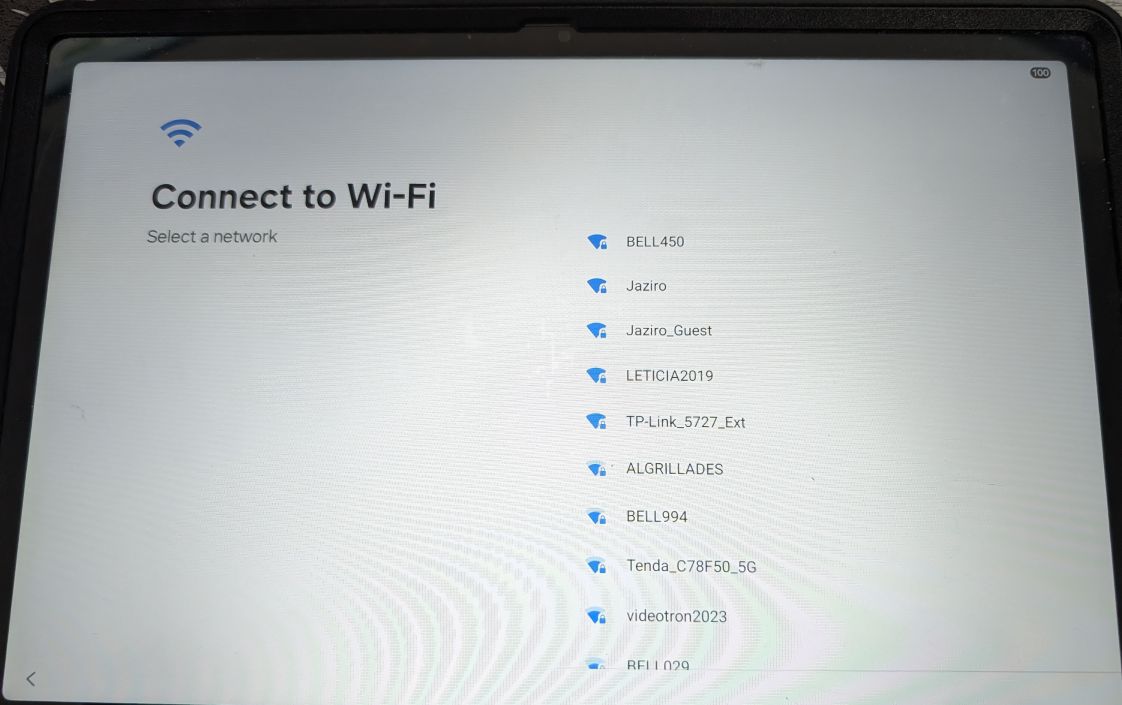
Select WIFI and enter Password to connect to the internet.
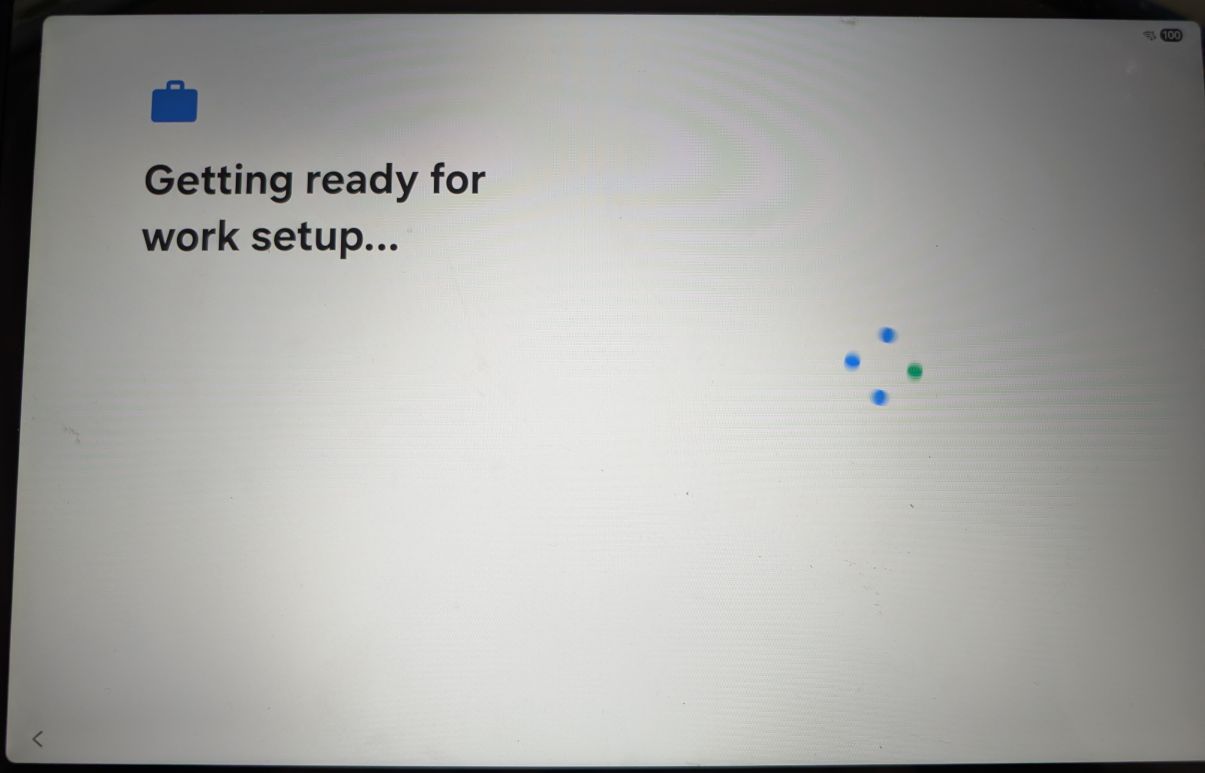
The tablet configuration begins immediately.
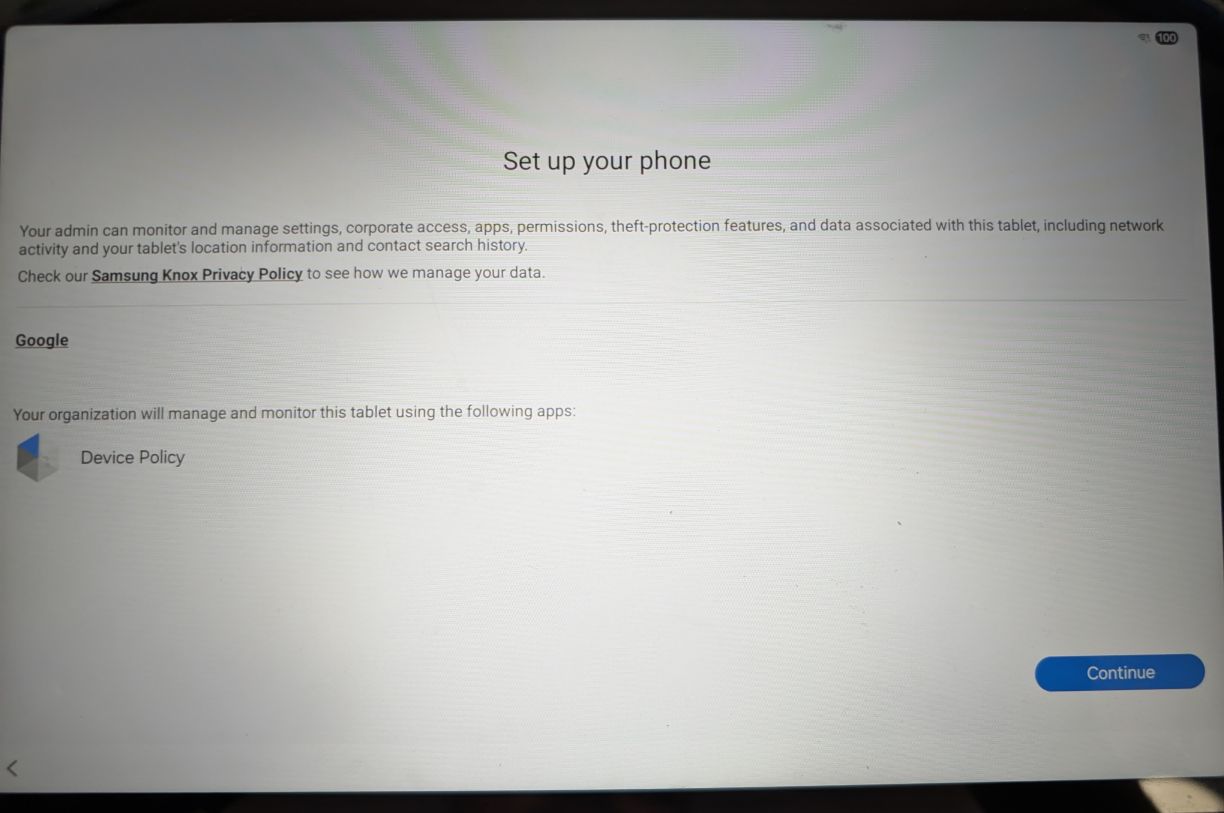
Click Continue.
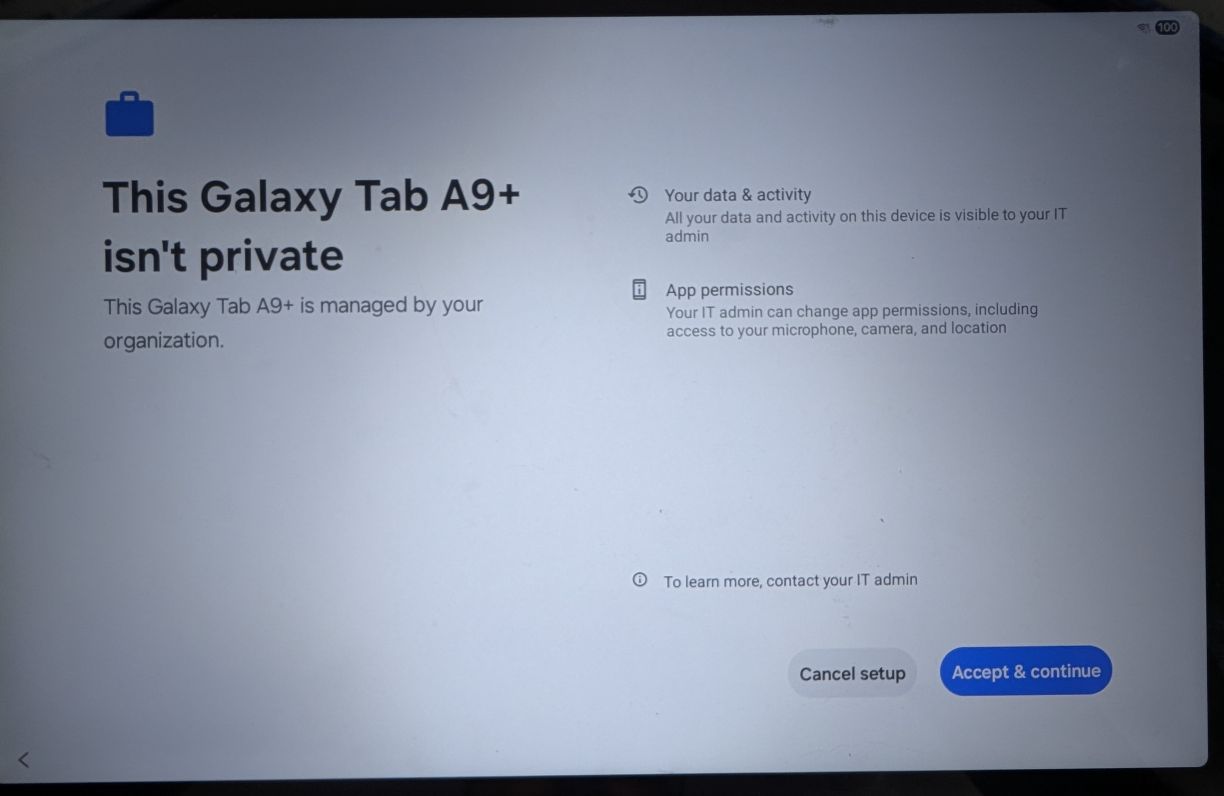
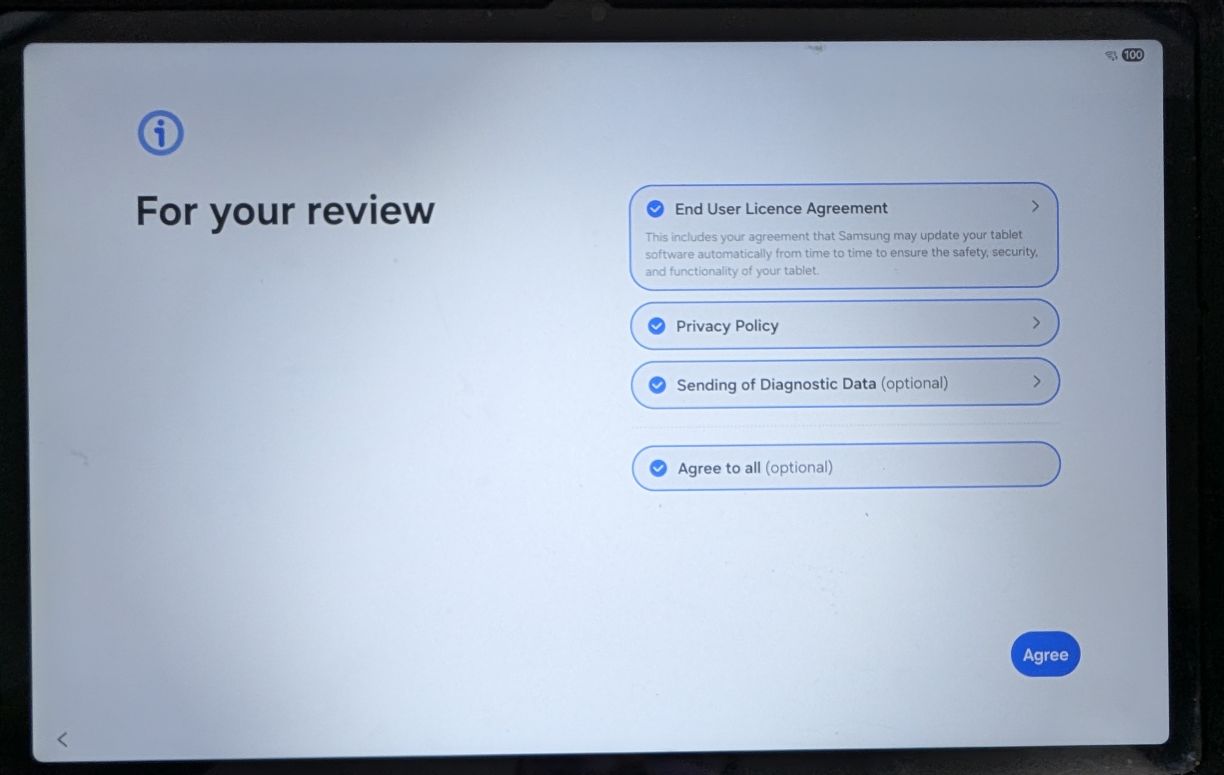
Accept the terms & conditions by clicking on “Accept & Continue“.
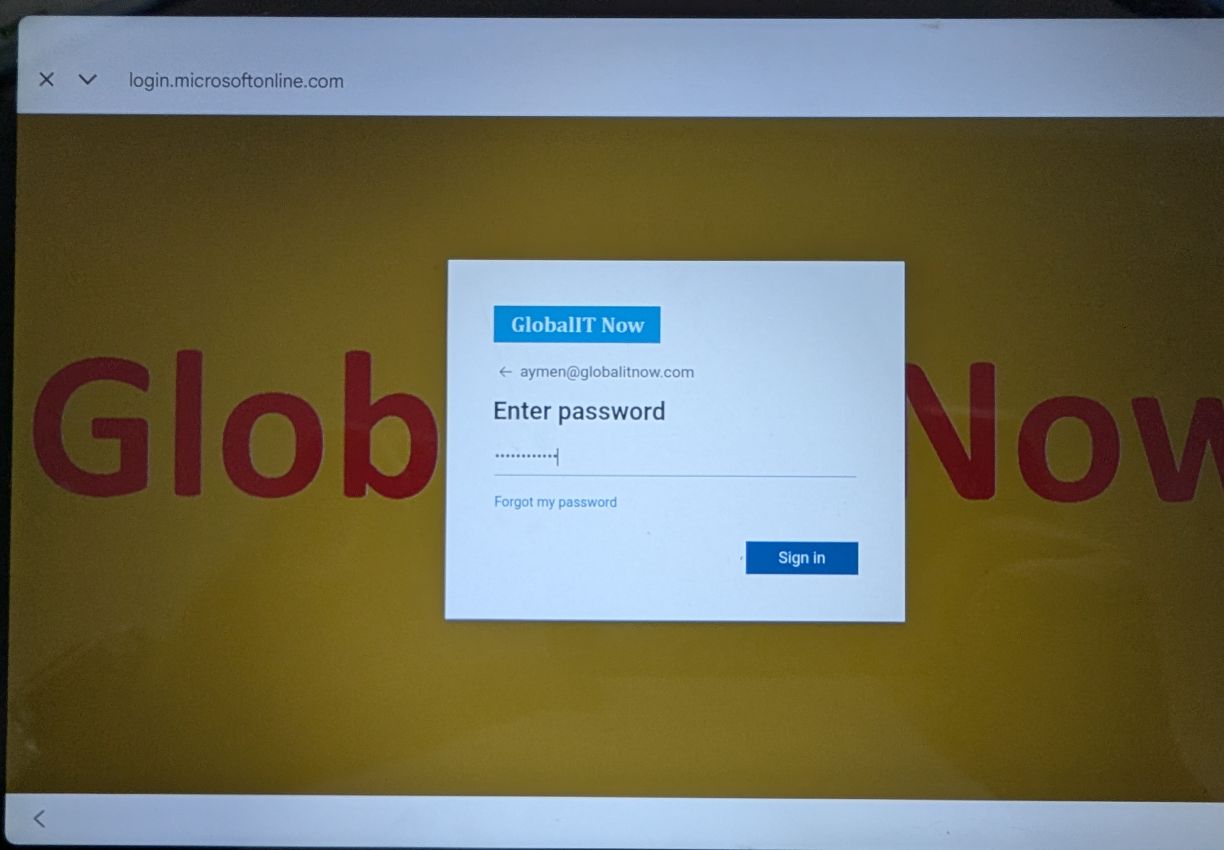
Sign-in to the main user M365 Account :
Enter Password and MFA.
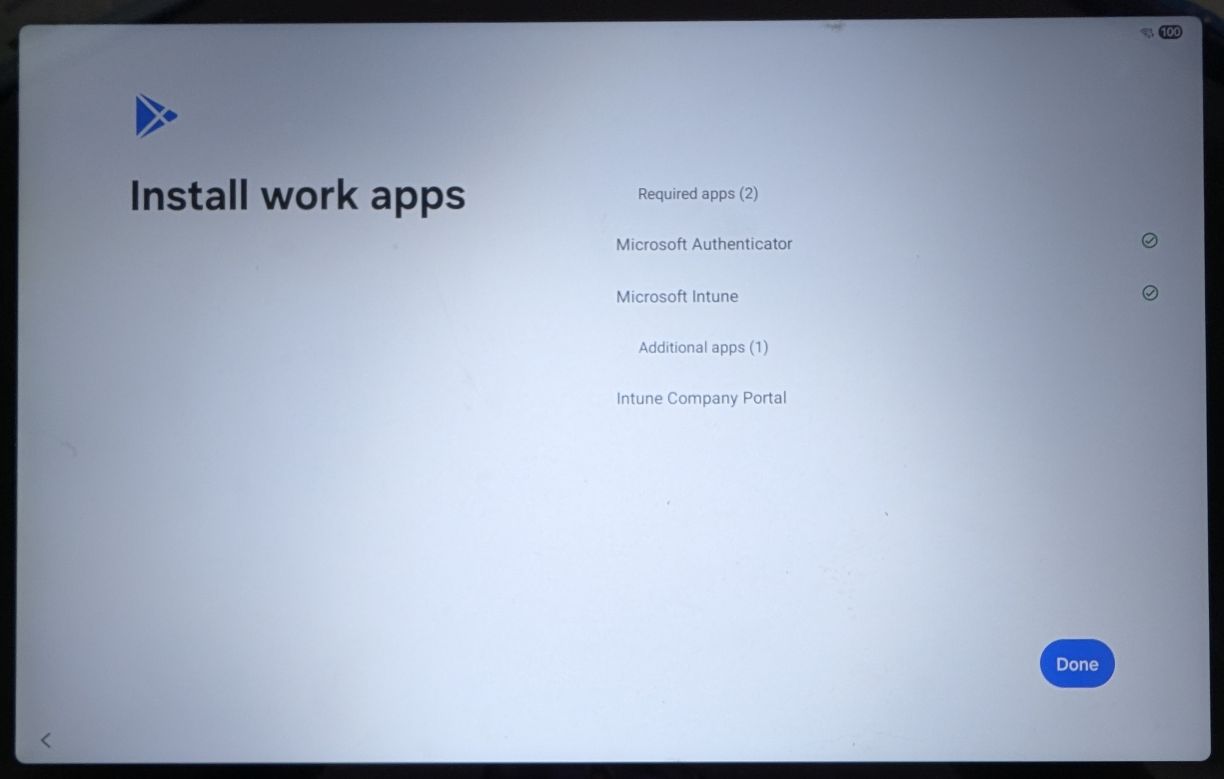
A window for installing company applications will open. I haven’t configured any apps yet, but the default applications are Chrome, Intune Company Portal, and Microsoft Authenticator.
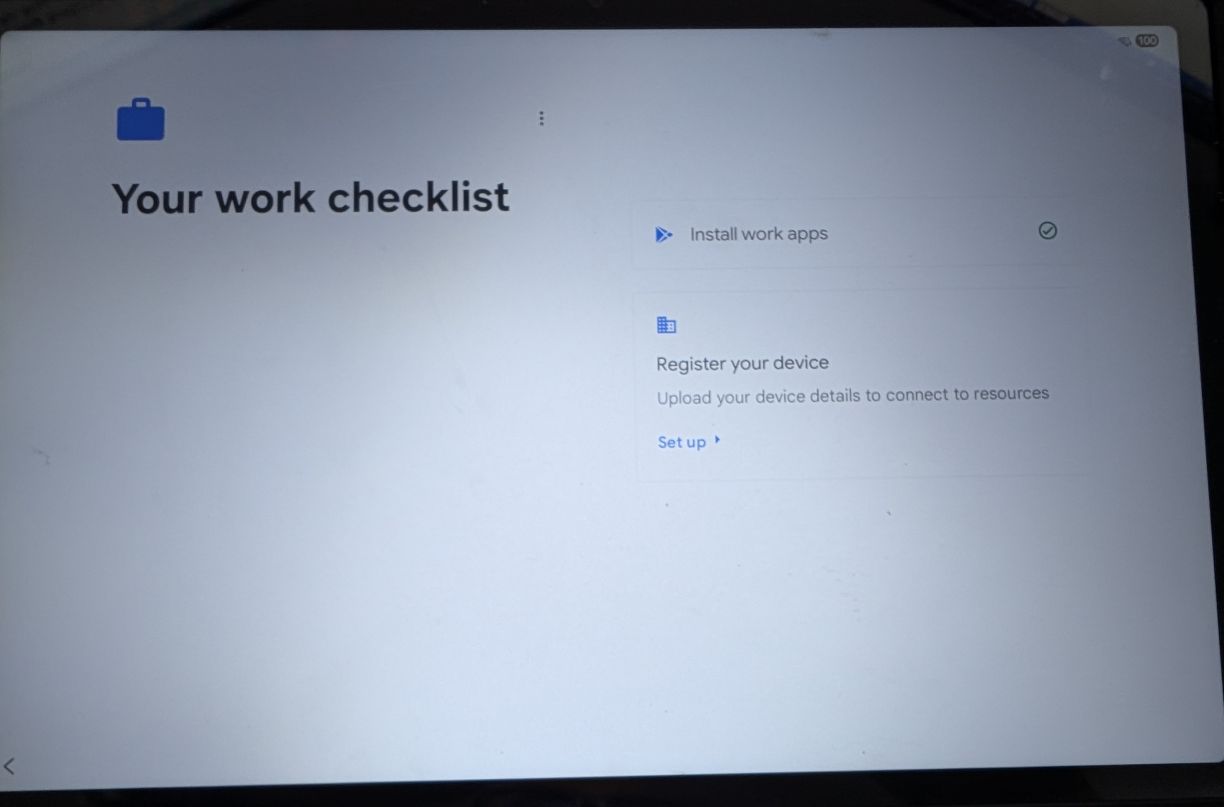
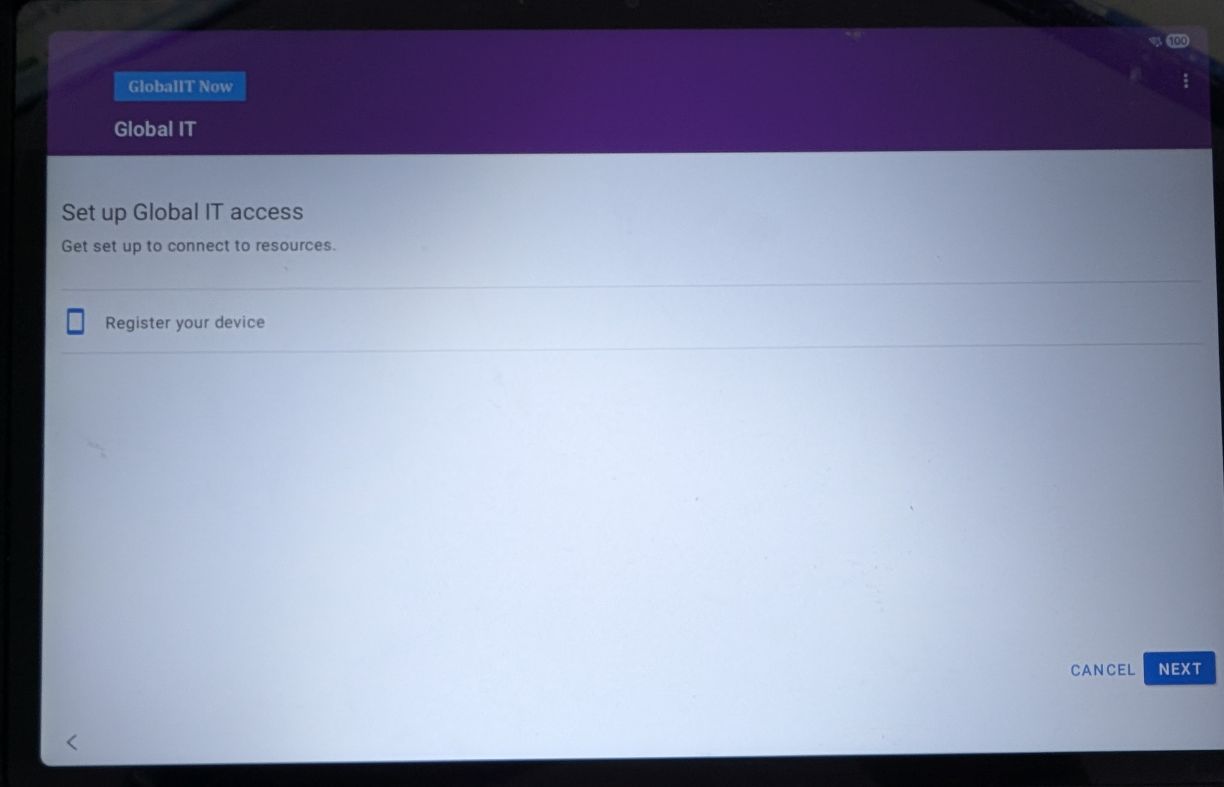
Select “Register your device” to start device registration.
Click Next.
Click Agree.
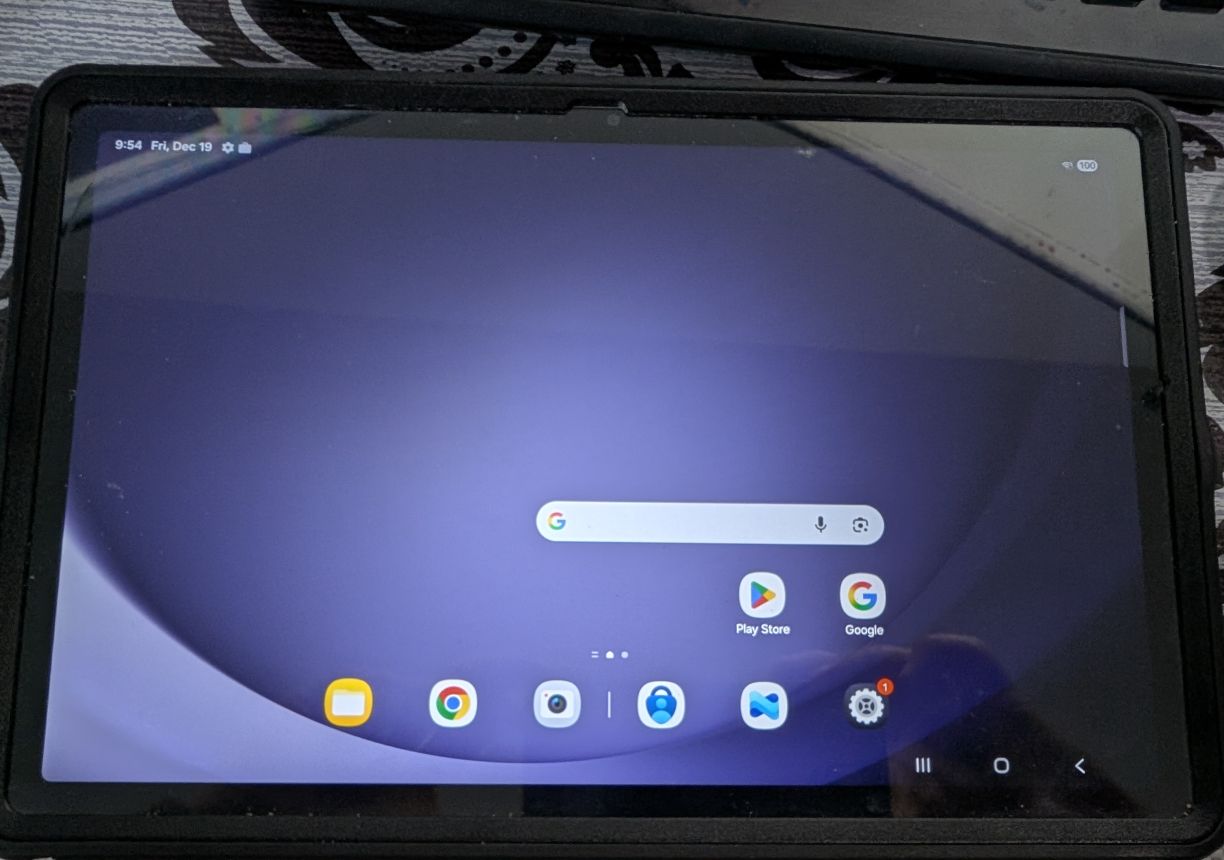
Enrollment finished successfully.
Here’s the main window for our Tablet.
Thanks
Aymen EL JAZIRI (Microsoft MVP)
Hi, I’m Aymen El Jaziri , a passionate System Administrator and Microsoft MVP, with years of hands-on experience in managing and securing modern IT infrastructures.
This blog is where I share technical guides, automation scripts, product reviews, and real-world solutions that help IT professionals simplify their day-to-day work and stay ahead in a fast-evolving cloud ecosystem.
Whether you’re here to troubleshoot an issue, improve your automation game, or learn new best practices , welcome in my blog !
Let’s build a stronger, smarter IT community together.
Feel free to connect with me on LinkedIn for more content, discussions, or collaboration opportunities.