Physical Address
304 North Cardinal St.
Dorchester Center, MA 02124
Physical Address
304 North Cardinal St.
Dorchester Center, MA 02124

Explore practical guides and tools for Microsoft 365, Azure, and PowerShell. Enhance your cloud security and admin skills with expert insights and automation tips.
Explore practical guides and tools for Microsoft 365, Azure, and PowerShell. Enhance your cloud security and admin skills with expert insights and automation tips.
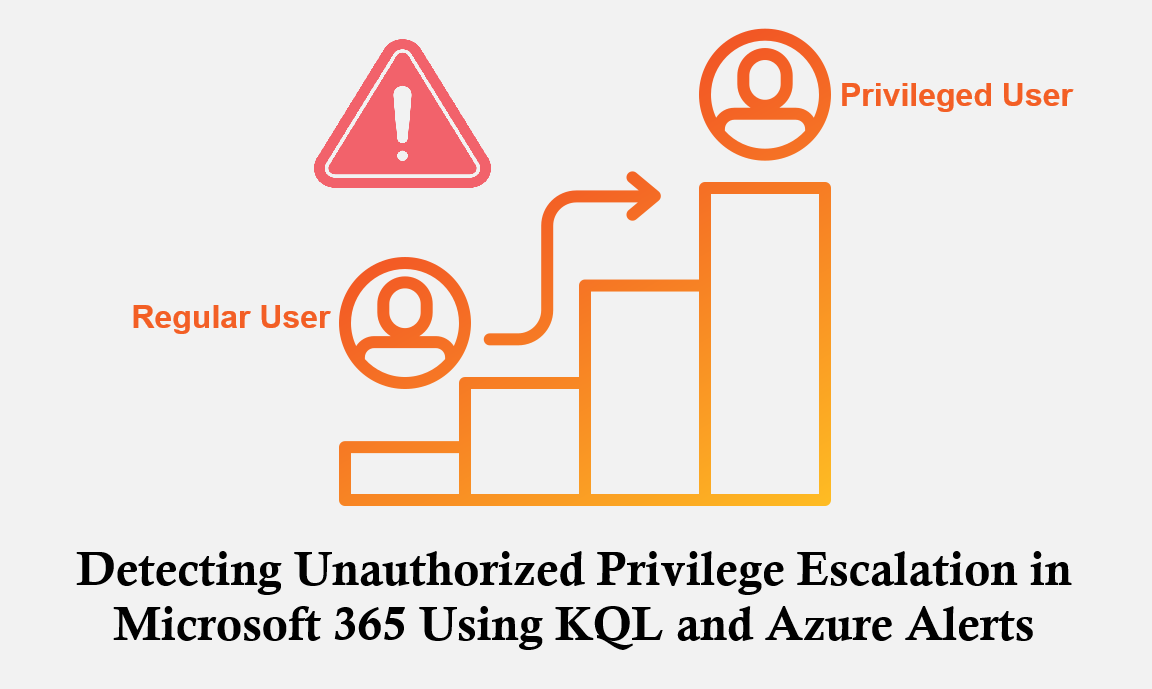
In modern cloud environments, identity is the new security perimeter. As organizations increasingly rely on Microsoft 365 for identity, collaboration, and administration, monitoring privileged access becomes a critical component of any security strategy. Unauthorized privilege escalation, whether caused by compromised accounts, insider threats, or configuration abuse, can lead to catastrophic consequences such as data exfiltration, persistence, or widespread compromise.
This article explains the importance of a targeted KQL (Kusto Query Language) query designed to detect role assignments and privilege changes in Microsoft 365, and how integrating this detection into Azure Alerts strengthens the overall security posture. A refined version of the query is also provided.
Adversaries seeking access to sensitive data or administrative capabilities often aim to elevate their permissions. In M365, roles such as Global Administrator, Exchange Administrator, or Privileged Role Administrator provide powerful access to cloud resources.
If an attacker gains access to an identity and assigns additional roles either directly or by adding the compromised user to privileged groups they can rapidly expand their foothold.
Microsoft 365 generates extensive logs for Directory Role changes. These logs include:
Leveraging these logs through Microsoft Sentinel or the Azure Monitor Log Analytics workspace is a best practice for SIEM-driven detection.
Privilege escalation should be considered a high-severity event. Detecting it early allows a security team to:
Setting up an alert based on this query ensures real-time visibility into security-critical events that could otherwise go unnoticed.
I explained in a previous article the steps to follow to create a Log Analytics Workspace. You can refer to that article for more details.
Steps :
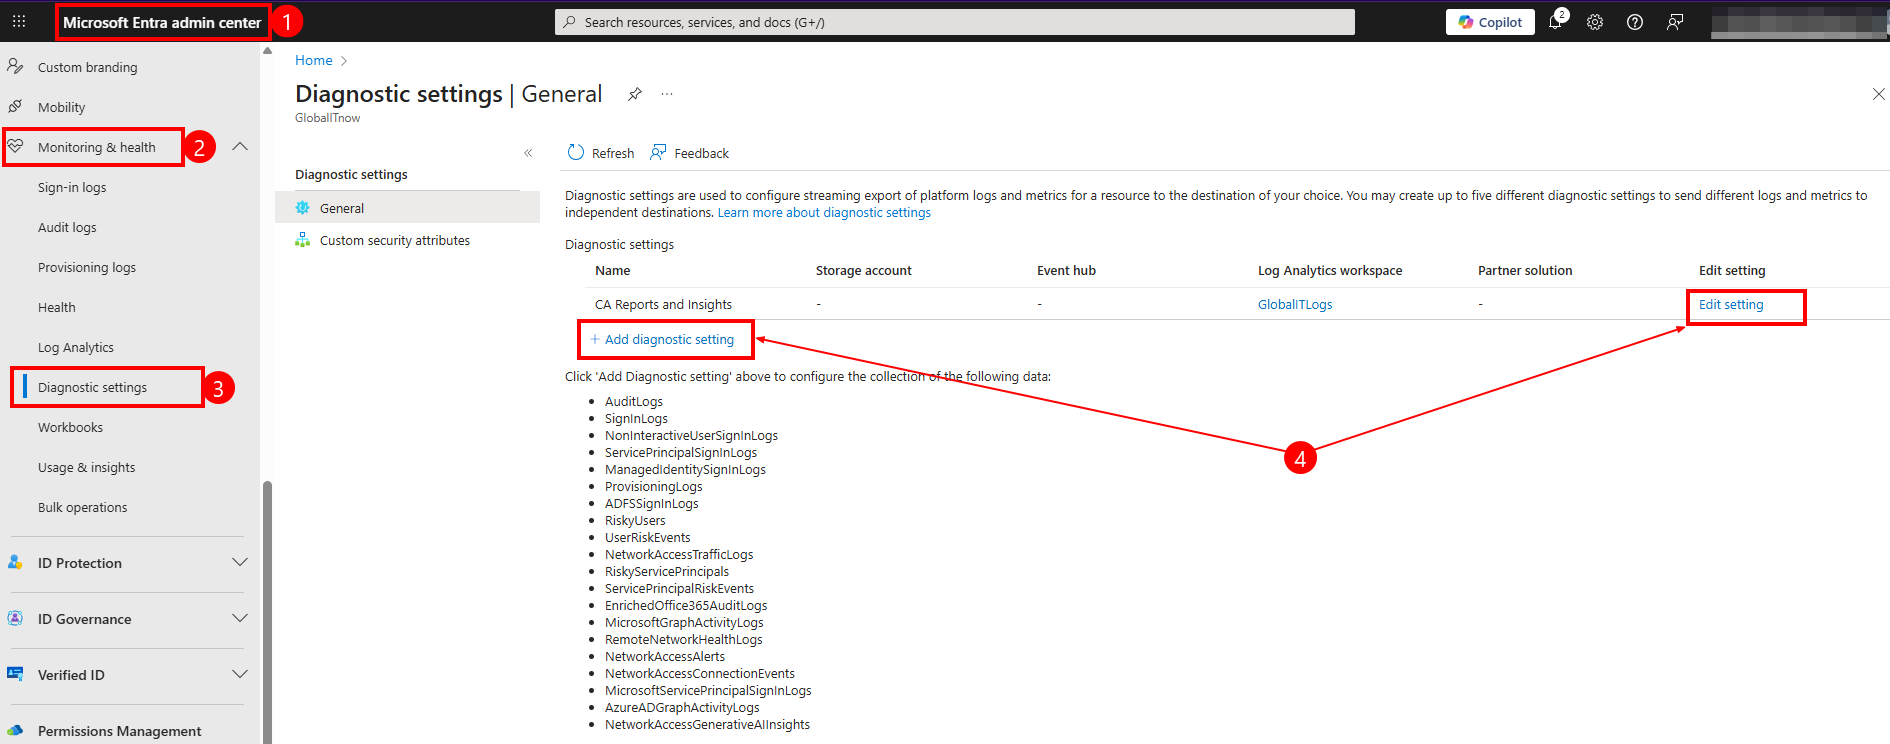
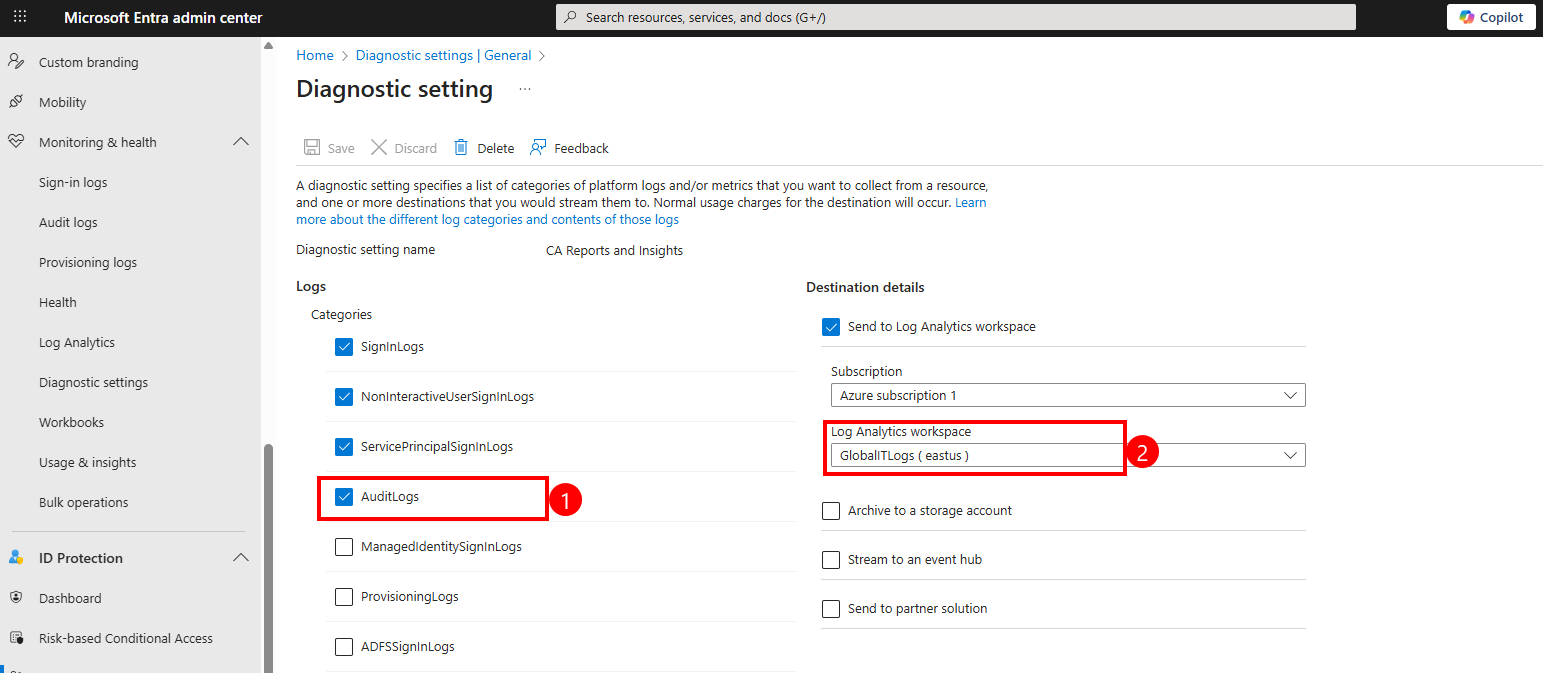
Keep in mind the AuditLogs table can take up to 24 hours to appear in your Log Analytics Workspace.
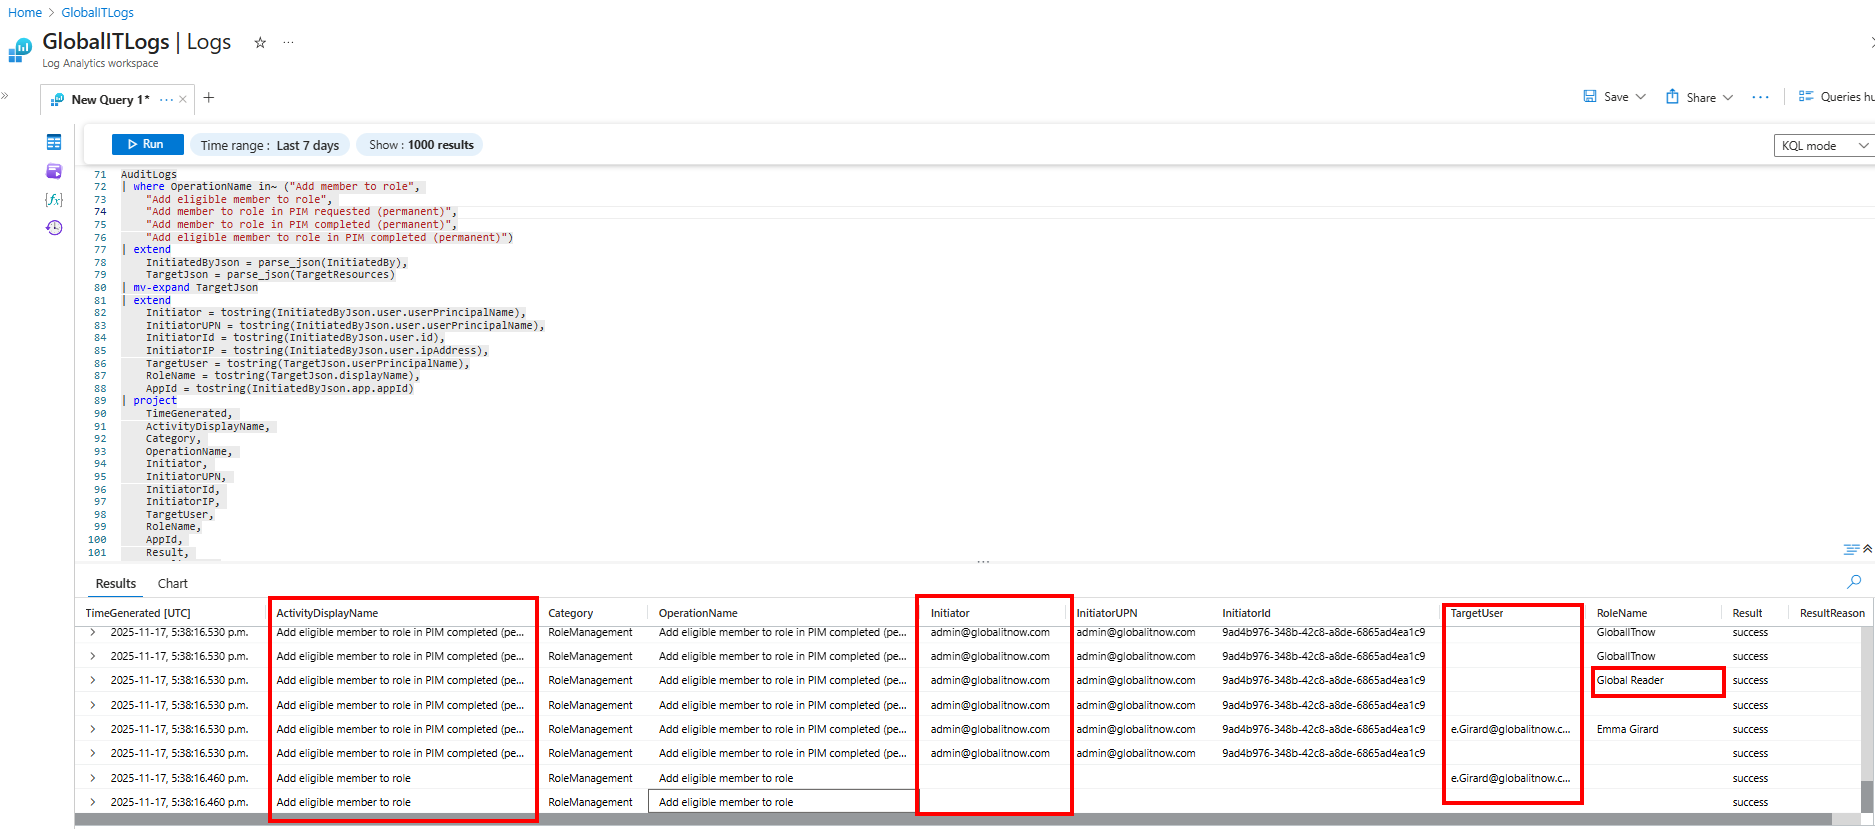
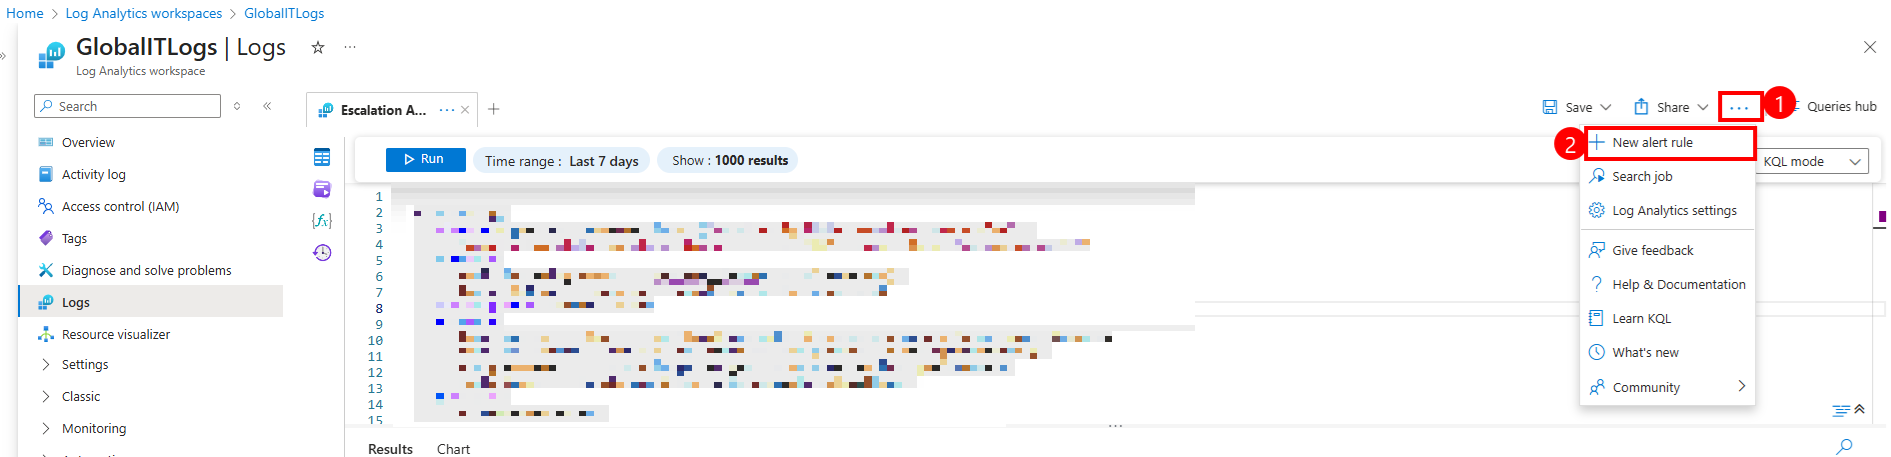
Find out the KQL query used to capture role changes from my Github Repository :
So, to be able to execute the query :

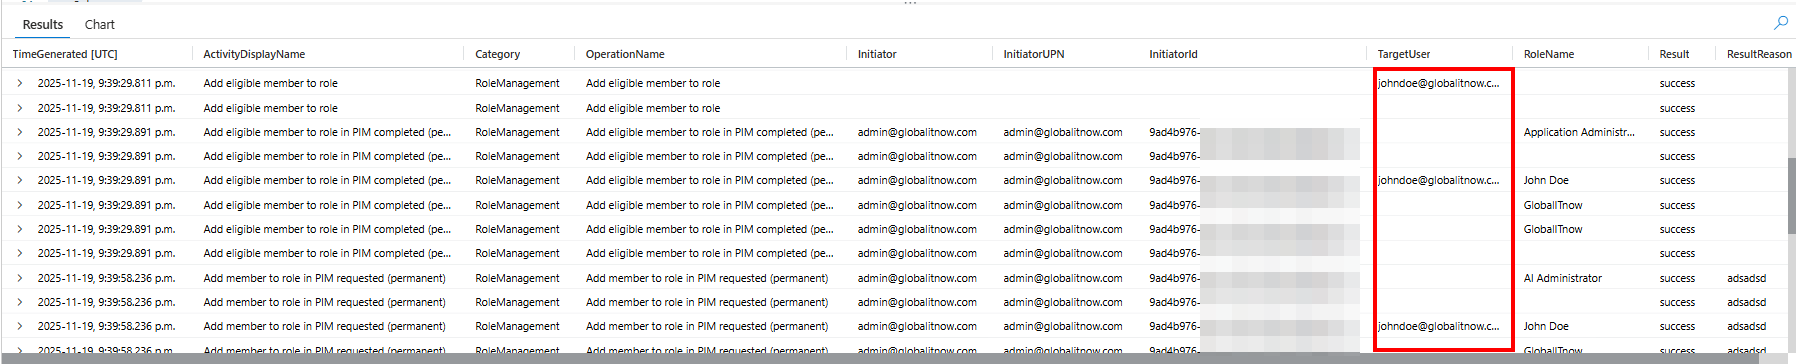
Review the results in the table below, which includes details like :

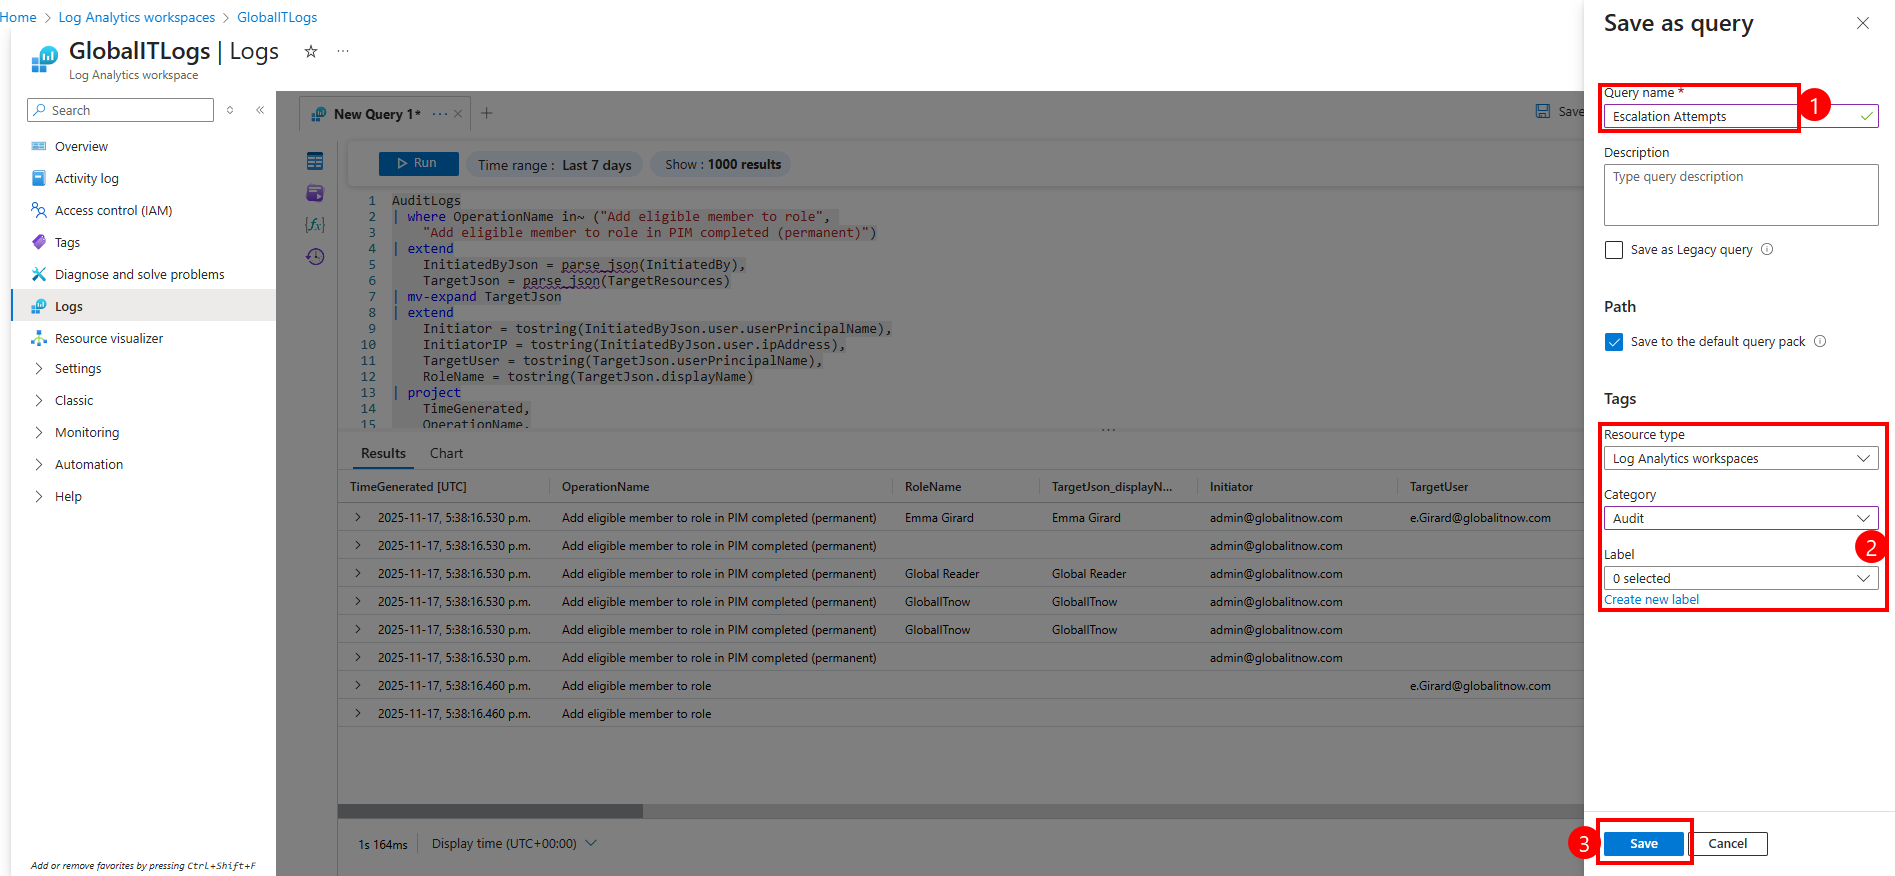
"Escalation Attempts". This is the title under which your query will be saved for future use."Detecting Unauthorized Privilege Escalation in Microsoft 365". Helps explain the purpose of the query to other users or future you."Log Analytics workspaces""Audit"This saves the query with all the metadata so it can be reused or referenced later.
Keep the query name in Notepad because we’ll use it later (
).Escalation Attempts
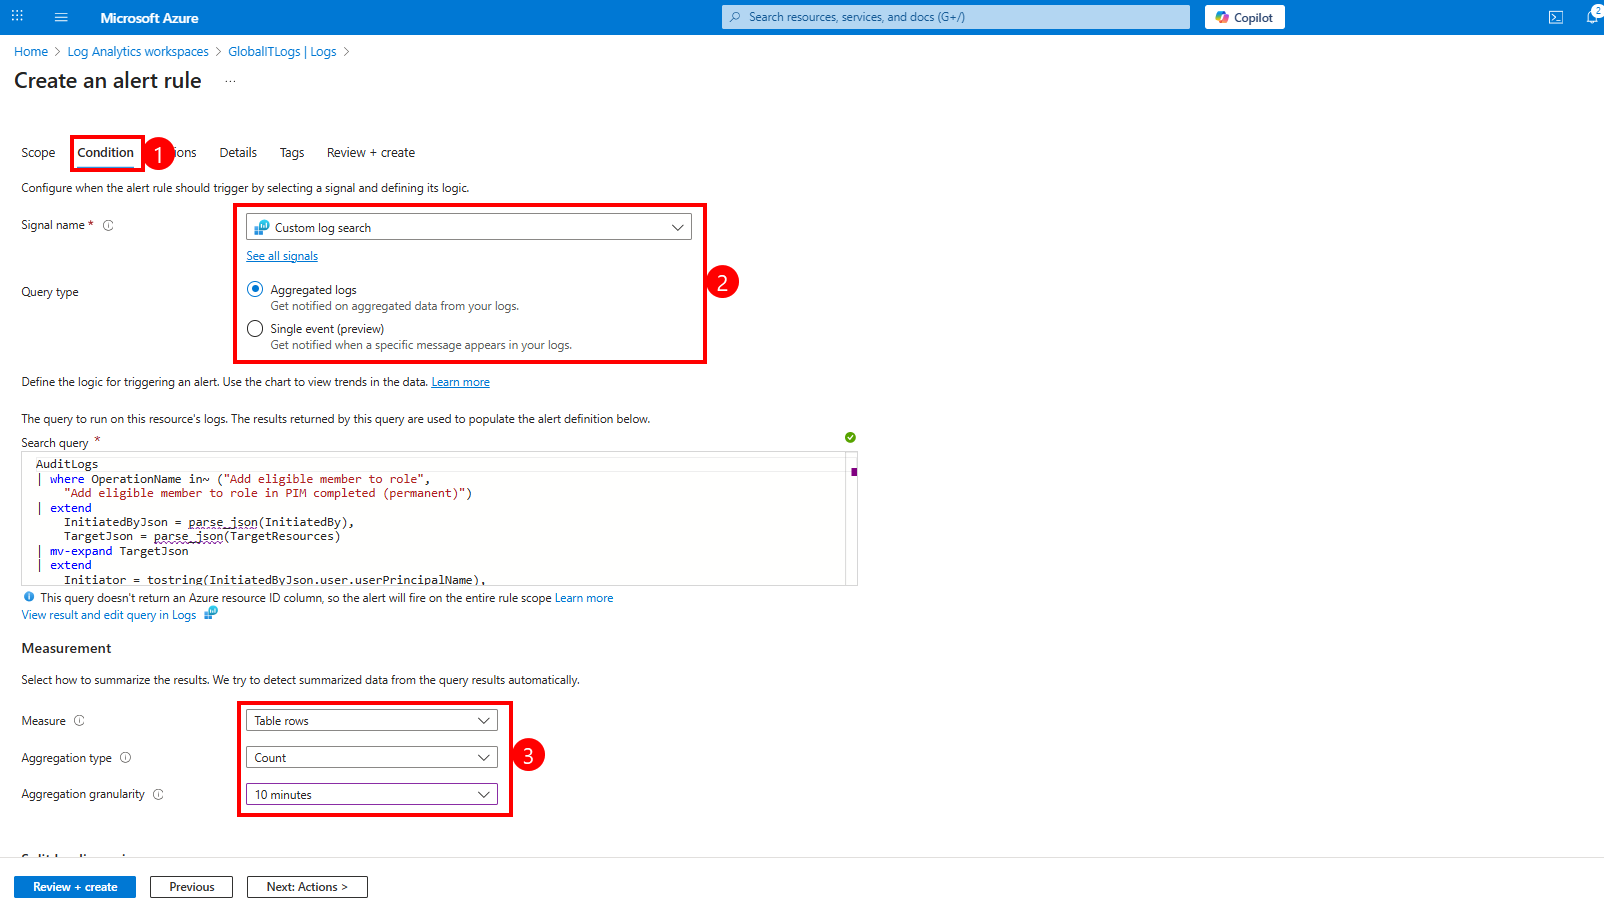
In the Condition section:
In the Measurement section:
Aggregation granularity Defines the time window over which the data is aggregated. Azure will evaluate the query every 10 minutes and count how many matching rows appear in that period.
Click “Next: Actions” to configure what happens when the alert is triggered (e.g., email, webhook, automation).
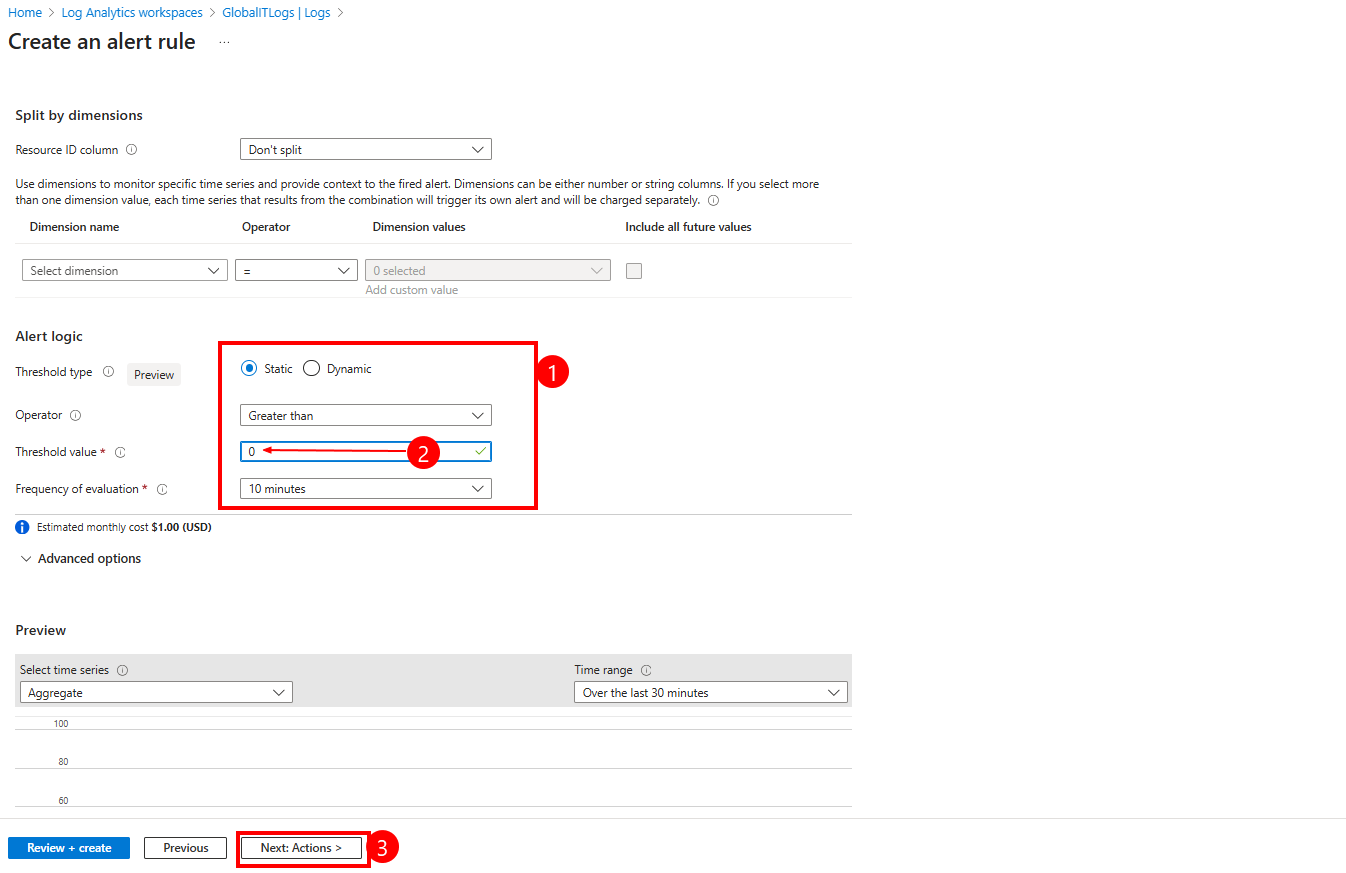
Define Alert Logic
In the “Action” section :
"Send Escalation Alert" to identify the group."Escalation" for easier reference.helpdesk@globalitnow.com, admin@globalitnow.com)."Alert - M365 Escalation right".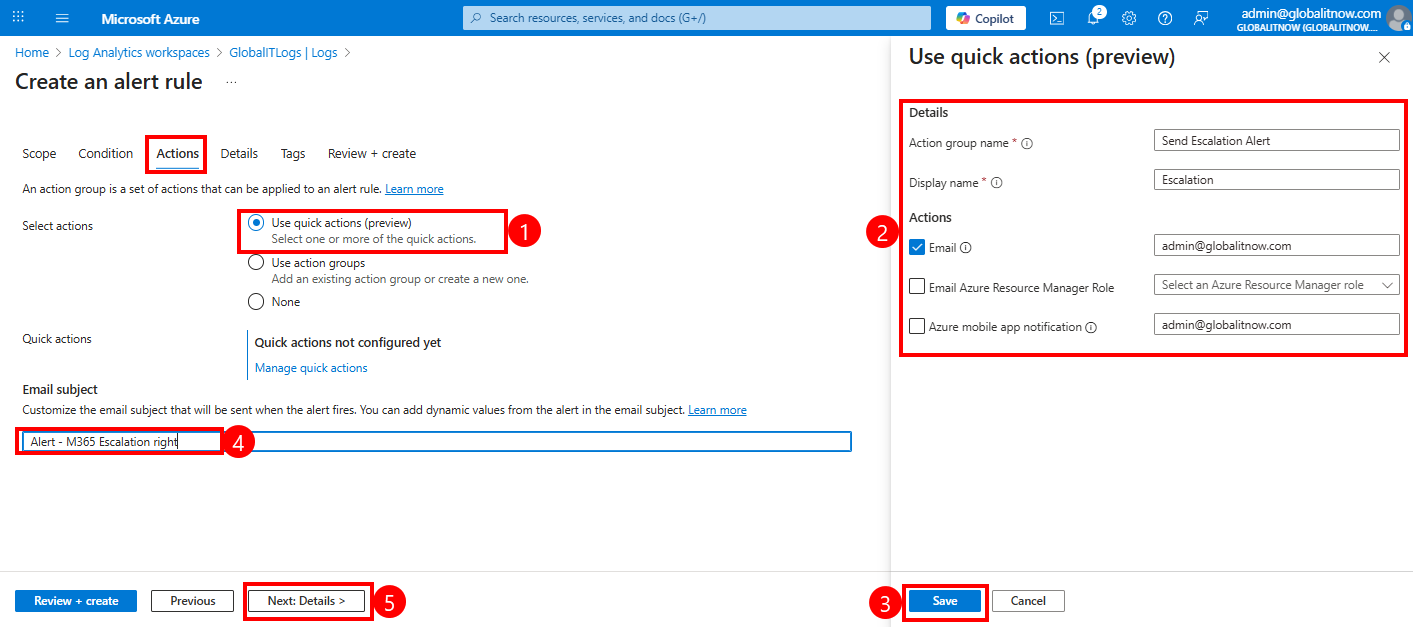
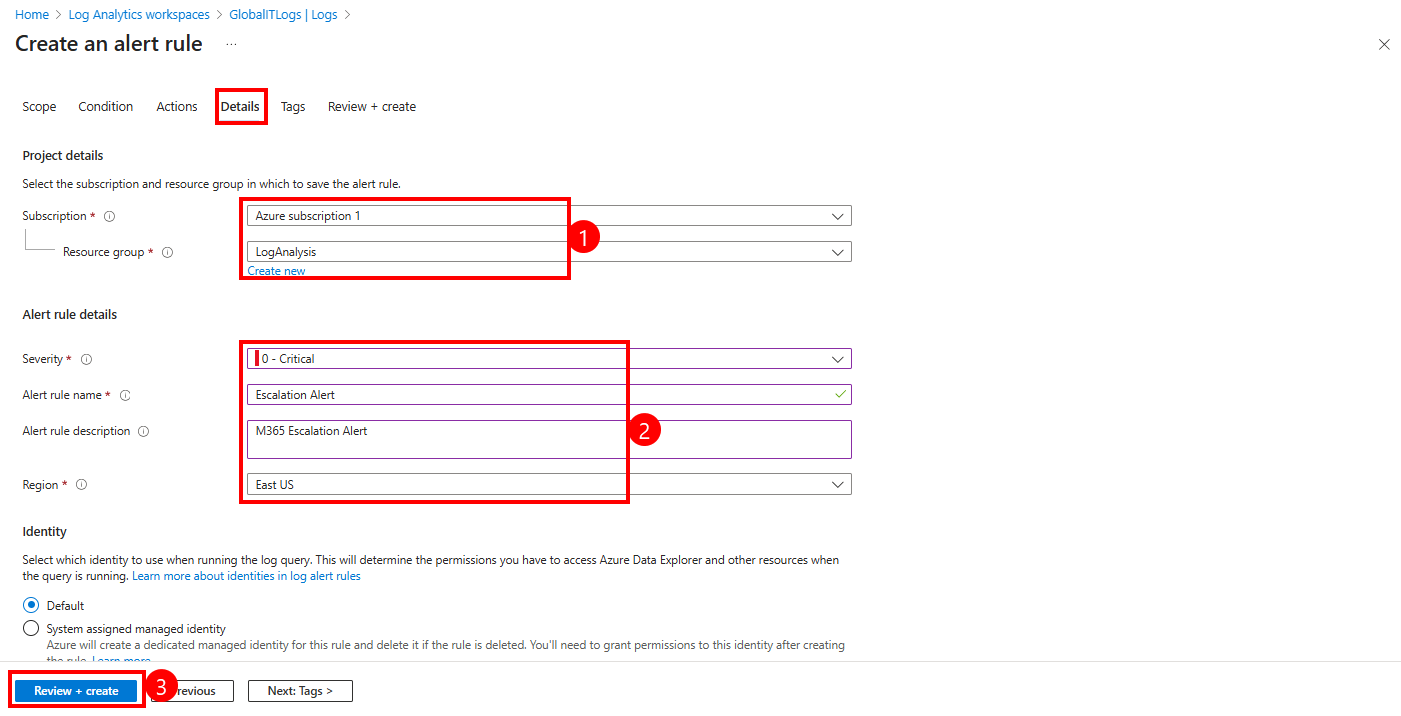
Click Create to finalize and deploy the alert rule.

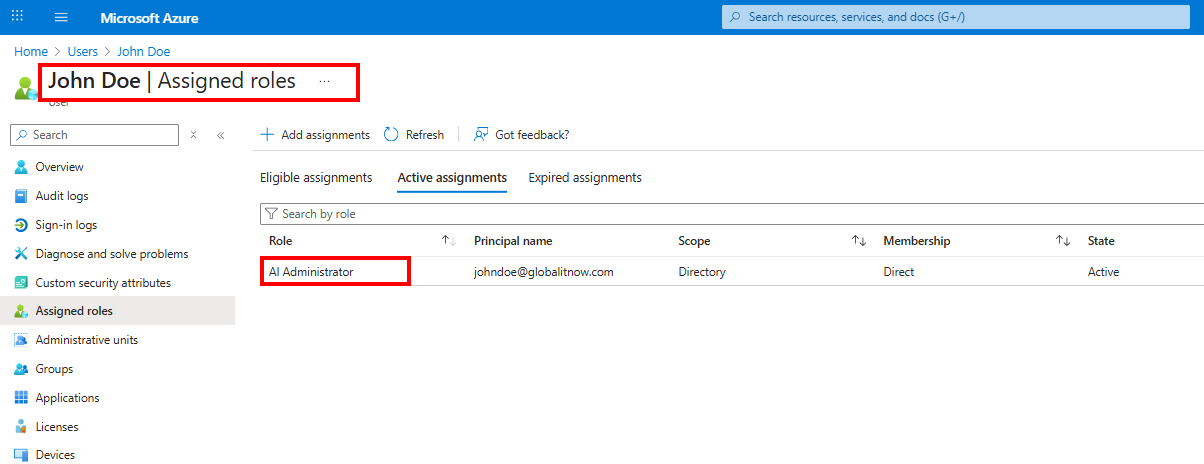
In this example I’ll give the “Ai administrator” role to John Doe, let’s see what happens :
Here is the notification in my mailbox :
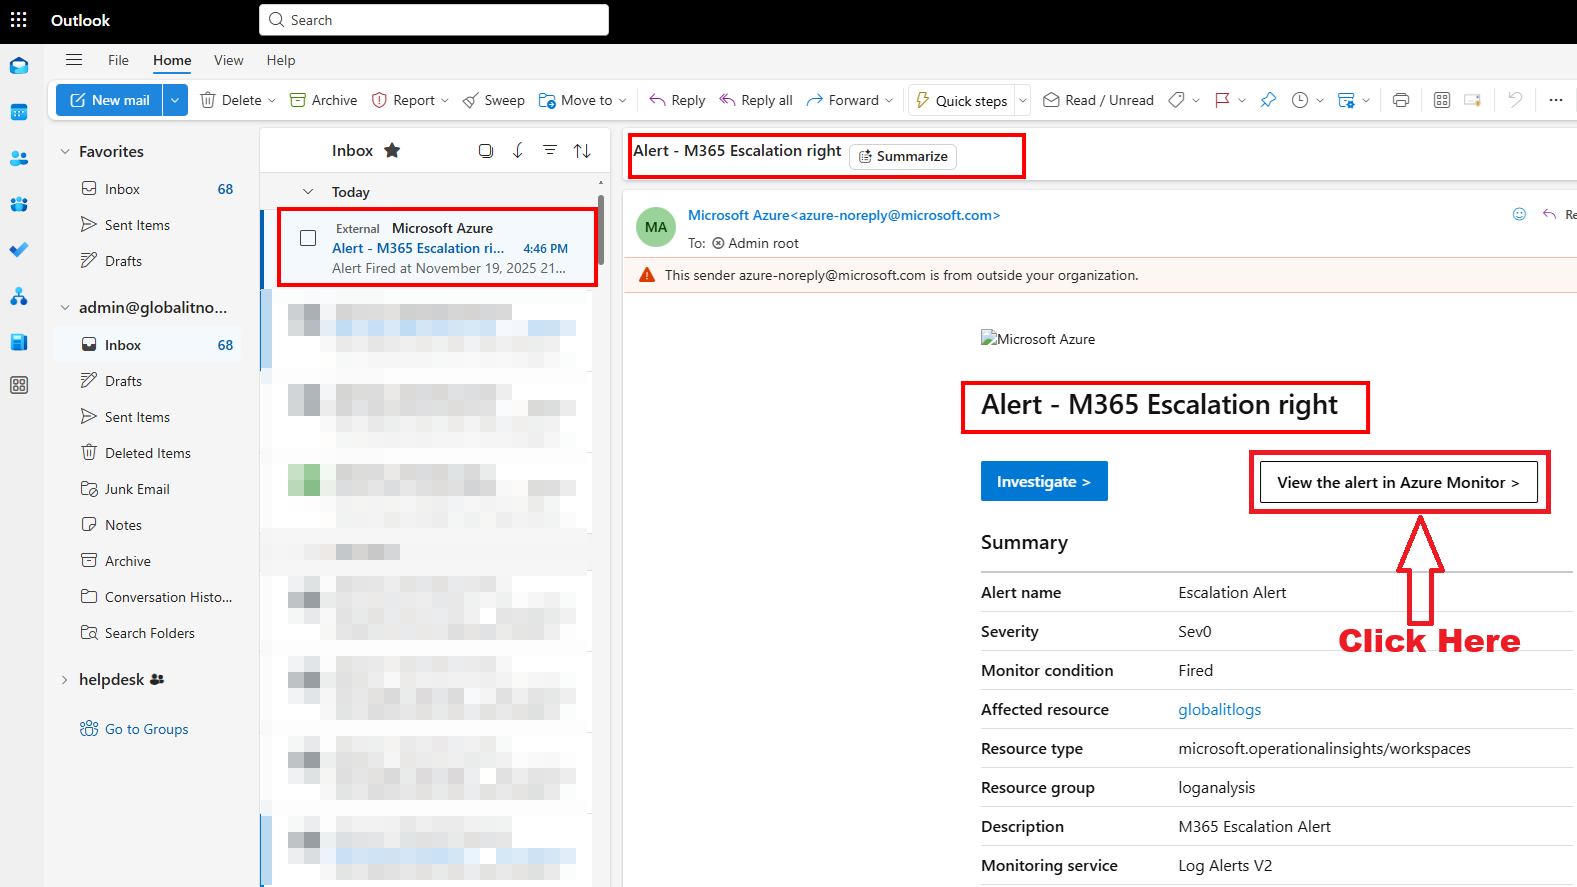

A new tab will appear with Alert results :
Thanks