Explore practical guides and tools for Microsoft 365, Azure, and PowerShell. Enhance your cloud security and admin skills with expert insights and automation tips.
Automate Microsoft Forms Response to SharePoint List (Create System Ticket as example)
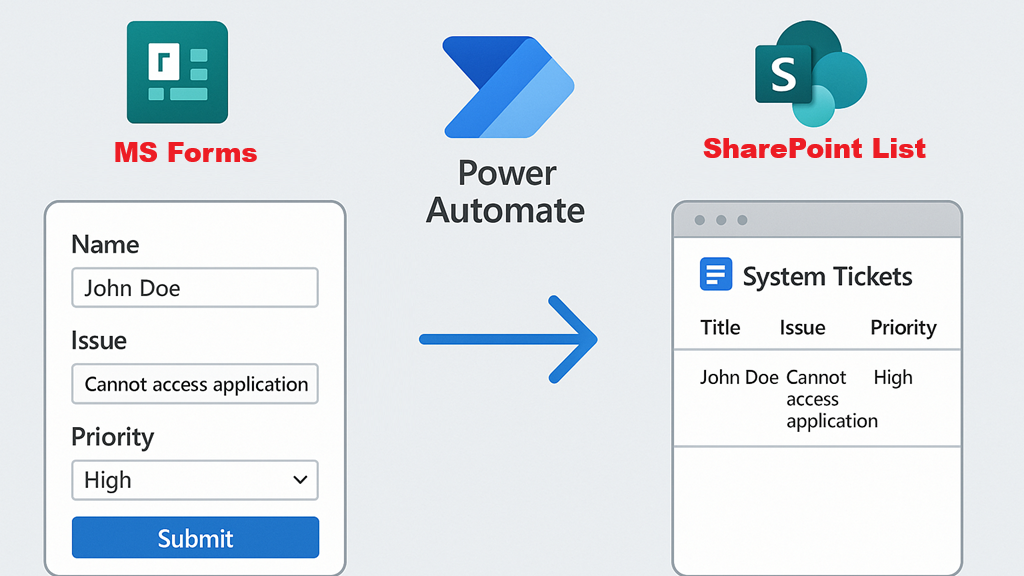
In this article, I’ll show you how to create an automated flow with Power Automate to retrieve the content of a Microsoft Forms form and send it to a SharePoint list. This method is not only more secure, but also more customizable than sharing a Microsoft Forms form directly from a SharePoint list.
The principle is simple and can be adapted to various workflows such as purchase requisitions, leave requests, and many others.
I’m going to explain in detail the steps involved in setting up a ticket system solution for an IT department as example. You’ll discover how to effectively automate this process to improve request management and optimize internal operations.
Ready to transform your ticket management? Let’s dive into the details!
Prerequisite :
MS Forms must be created with licenced user.
List in Sharepoint Site.
Power Automate licence (free)
1 – Create New Forms :
In this forms I have created 5 Fields (Object, Description, Email, Phone and Print screen), you add or adjust fields as your convinience.
Next step is creating sharepoint list.
2 – Create New List :
I have already created SharePoint Site “System Ticket”, then I have created new list by selecting “New” then “List“.
here I will select “Create list from blunk” because I will customize my list.
Give a name to list then select create
Start creating columns according to your needs by selecting “+ Add columns” :
I have adjusted my list and I have created first ticket. I have Added columns like this :
ID : This column exist by default, you just need to enable it from Show/hide right clic menu.
Ticket status : choice with “New/Assigned/Resoled” values (You can add more values if you want.
Created By : the person who’s create the ticket (this column is created by default you need only ti show it).
Creation time : (this column is created by default you need only ti show it).
Object : object of the ticket.
Description : description of the ticket.
Email : email to contact end user.
Phone Numer (Optional) to call user if his laptop doesnt work for example.
Print Screen : image file to help technician undestanding the issue.
Here is the first ticket created manually just for test.
Next step is to create Power Automate flow.
3 – Create Automated flow with powerautomate :
Go to power Automate :
Select Create
then select “Automated cloud flow“
Give a name to your Power Automate Flow.
Select “When a new response is submitted“
Slect the first item then select the forms we have created to open new ticket
Click “➕” to add new flow
in search bar type “get response“
select “Get response details“
Select forms we have created to open new ticket.
select “Electrical logo” then select Response id.
Click “➕” to add new flow
In the search bar type “Create new item”
Select “Create item” in Sharepoint section.
Type Sharepoint Site URL
Select List by name
for all fields, select electric logo ⚡ then select the corresponding object.
Clic save to save your automated flow.
next step is to test automated flow.
4 – Test New Ticket creation :
Connecting to forms, fill fields thens submit ticket.
As you can see, new ticket has been created seccussfully.
Thanks
Aymen EL JAZIRI (Microsoft MVP)
Hi, I’m Aymen El Jaziri , a passionate System Administrator and Microsoft MVP, with years of hands-on experience in managing and securing modern IT infrastructures.
This blog is where I share technical guides, automation scripts, product reviews, and real-world solutions that help IT professionals simplify their day-to-day work and stay ahead in a fast-evolving cloud ecosystem.
Whether you’re here to troubleshoot an issue, improve your automation game, or learn new best practices , welcome in my blog !
Let’s build a stronger, smarter IT community together.
Feel free to connect with me on LinkedIn for more content, discussions, or collaboration opportunities.