Physical Address
304 North Cardinal St.
Dorchester Center, MA 02124
Physical Address
304 North Cardinal St.
Dorchester Center, MA 02124

Explore practical guides and tools for Microsoft 365, Azure, and PowerShell. Enhance your cloud security and admin skills with expert insights and automation tips.
Explore practical guides and tools for Microsoft 365, Azure, and PowerShell. Enhance your cloud security and admin skills with expert insights and automation tips.

Windows Autopilot is a Microsoft cloud-based service that streamlines the deployment of new Windows 10 and 11 devices within your organization. It essentially automates the setup process, saving IT time and resources.
There are no Infrastructure requirements for using Autopilot as it’s a Cloud-based service offering that is a part of Microsoft Intune.
Here’s a breakdown of its key benefits :
In essence, Windows Autopilot offers a smoother, faster, and more secure way to get new devices into the hands of your employees and ready for work.
In the days before Autopilot, IT admins had to maintain various versions of custom Windows images for deploying on organization workstations. However, creating custom Windows images and maintaining drivers for every device model is not required with Windows Autopilot.
Windows Autopilot utilizes an OEM-optimized version of Windows 10/11, usually pre-installed. Instead of reimaging the device, you can leverage the existing Windows installation to make it ‘business-ready.
Below is a high-level Autopilot Process diagram illustrating the Windows Deployment Lifecycle using Autopilot.
You can Reset the Laptop at any time from the Business ready state, similar to resetting the laptop to its factory default settings. [Break-fix scenario].

To leverage Windows Autopilot and unlock its features, ensure you run a supported version of the Windows client. Refer to the list below for the compatible versions :

In addition to the supported Windows Client operating system requirement discussed in the previous section, ensuring compliance with the necessary licensing requirements to utilize this service is essential. Autopilot capability also necessitates an MDM service, such as Microsoft Intune.
Windows Autopilot requires one of the following subscriptions :
I will demonstrate the setup of Autopilot from scratch. If you have already configured any of the settings mentioned in the steps, you can skip it and proceed to the next one. I will use a virtual machine called “Windows 11×64” to showcase the Autopilot process.
Let’s check the steps:
The first step is to ensure users have been assigned an Intune license. You can assign any of the licenses listed in the previous section, Windows Autopilot Licensing Requirements.
This is my licence :

If you want the devices enrolled in Intune, they must join Entra ID. Select All to ensure all users can join devices to Entra ID.
Alternatively, you can choose the Selected option and use existing Entra security groups containing users who can join devices to Entra ID.

After a device joins Entra ID and has Automatic Enrollment enabled, the device will also enroll in Intune. To configure Automatic Enrollment, set the MDM user scope to All and the Windows Information Protection (WIP) user scope to None.
Please note that you can also select MDM user scope as Some and use Entra security groups to target a specific list of users who can join devices to Entra ID and enroll their device in Intune.
follow these steps to begin configuration :


Company branding settings enable you to customize the out-of-box experience (OOBE) for users. You can showcase your company logo and adjust colors to match your organization’s theme. This also ensures that the end user enrolling in the device is connected to the correct organization.

Complete the “Sign-in Form” and select “Review + save“

The enrollment status page appears during the initial device setup and the first user sign-in. If enabled, users can view the configuration progress of assigned apps and profiles targeted to their devices.
Most configuration options are self-explanatory; you can use the default configuration options or modify them as per your requirements. Below are the steps to Enable and configure the Enrollment status page (ESP).


We are going ahead with the default ESP configuration below:

Create an Entra Dynamic Security group for Autopilot devices. This group is necessary to automatically assign an Autopilot Deployment Profile to devices joined to Entra ID using the Autopilot process.
Follow the steps below to create a new Entra Dynamic Security group for Autopilot. You can also use the Intune admin center to create an Entra dynamic security group.

In my case, every Device name that starts with : “GIT0” + 3 Numbers (GIT0123 , GIT0254 , GIT0789…etc)
(device.displayName -match "GIT0[0-9][0-9][0-9]")we will see in the next section how to Auto Rename device directly from Intune.

The next step is to create an Autopilot deployment profile, which will customize the Out-of-Box Experience (OOBE) and deployment mode for end users. You can create up to 350 deployment profiles in a single Intune tenant.
To create an Autopilot deployment profile, follow the below steps:


Provide a Name and Description of the Autopilot deployment profile. For Example:

Configure Out-of-box Experience (OOBE) for Autopilot devices.
User-Driven : Devices are associated with the user enrolling the device and user credentials are required to provision the device
Self-Deploying : Devices are not associated with the user enrolling the device and user credentials are not required to provision the device.
You also have an option for Microsoft Entra Hybrid Joined. Select it if you have On-prem Active Directory-joined Windows devices.
This is useful and prevents users from changing account options from corporate to personal accounts, e.g., a Microsoft account. You must configure company branding in Microsoft Entra ID to hide these options.
if you want the new deployed account to be of the standard type by default.
You can configure the specific language settings here or leave them as the Operating system default.
If you have configured the Language (Region) setting, you can skip this option by selecting Yes.
I’m gonna go with self-deployment mode, all settings will bes selected automatically and this will be like 0 tuch configuration.

Assign this Autopilot deployment group to the Entra Dynamic Security Group we created in Step 6.
Click on Add groups and select the group to add, then clic on “Next“

Review the Autopilot deployment profile summary and click on Create to create the profile.


Normally, the next step is to manually import the “Device Hardware Hash CSV” into Intune using a flash disk or by sharing it over the network, but I’ll show you a simpler way to do it using PowerShell, as we’ll see in the next section.
Now, it’s time to pass to action, we will start Windows Autopilot setup.
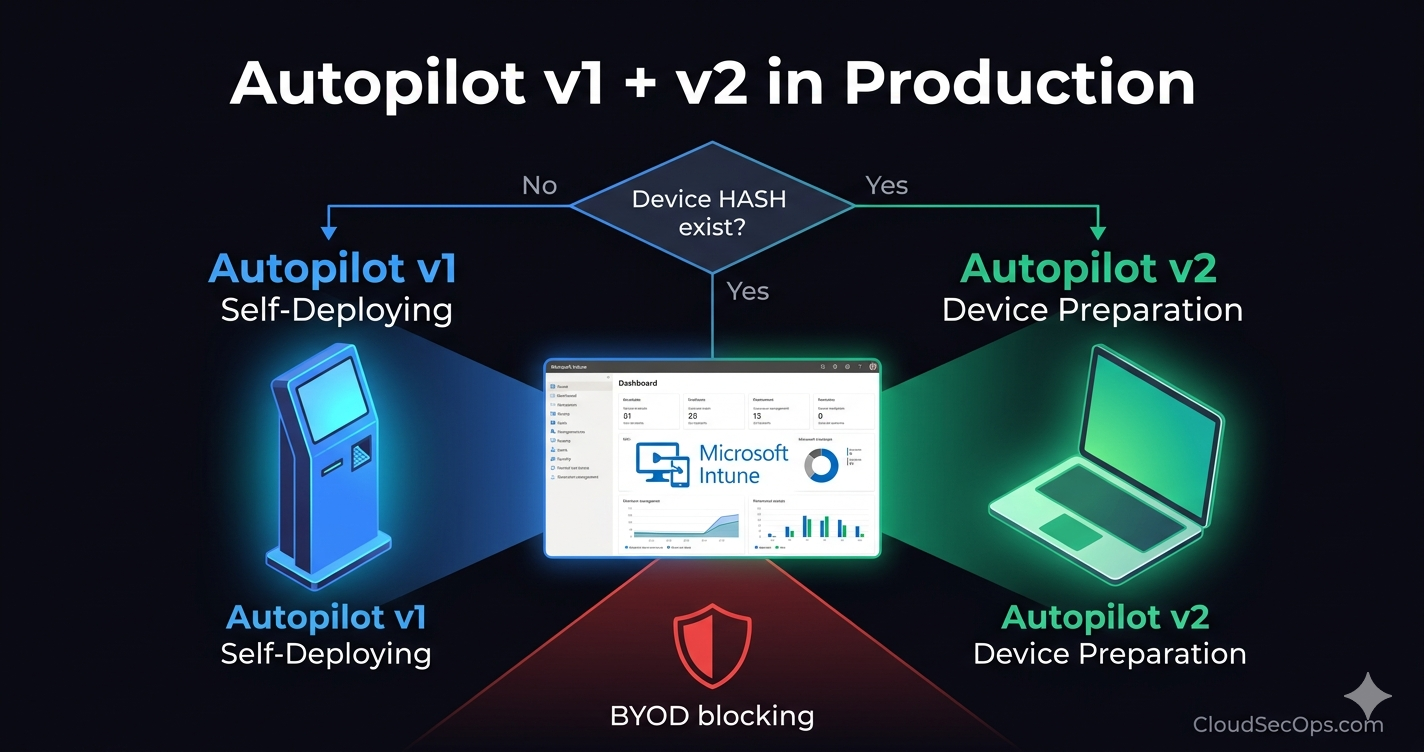
Before Formating or Reseting Device, we need to upload device HASH to Microsoft Intune Portal, this step makes device Known by Microsoft Intune (Device HASH is based on Motherboard Serial Number).
We can get Device Hash through two methods :
A – Export Device HASH using Local CSV File
To get Hash you can simply execute this powershell script (This script will export Device HASH to CSV file in C:\Temp)
[Net.ServicePointManager]::SecurityProtocol = [Net.SecurityProtocolType]::Tls12
Set-ExecutionPolicy RemoteSigned -Force
Install-Script -Name Get-WindowsAutopilotInfo  -Confirm:$false -Force
if(!(test-path("C:\Temp"))) { mkdir "C:\Temp" }
Get-WindowsAutopilotInfo -OutputFile "C:\Temp\Autopilot-$(Get-Random -Minimum 1 -Maximum 1000).csv"
Here is CSV file :

Then Go to :


Here is new device HASH suucessfully added.

B – Export Device HASH Online
Start PowerShell command line as administrator and execute this code to install Get-WindowsAutopilotInfo Script :
Set-ExecutionPolicy Bypass
install-script Get-WindowsAutopilotInfo
Next step is to register the new device directly on intune (No need to export CSV file through USB device or Shred folder).
Get-WindowsAutopilotInfo -Online
after authentication process you will see this window , Select Accept (this consent is to allow script adding device HASH directy in Intune).

As you can see here : 1 device successfully added

there are two ways to do the rest :

select “Recovery” then clic on “Get started” buton to start PC reset.


I personally prefer sysprep because it gives me the option of choosing the “OOBE” type of system cleanup, so we’re going to continue in this way.
Start with “Win + R” and type sysprep :

then double clic on sysprep program, be sure that both of “Enter System Out-of-the-Box Experience (OOBE)” and “Generalize” options are selected then clic on “OK” buton :

This screen typically appears during the initial setup of a Windows device being prepared for integration into a work or school network, ensuring proper configuration and security measures are in place.
In our Autopilot Deployment profile, we configured it not to show the Privacy terms and Microsoft Software License agreement , therefore, those screens will be hidden. You may notice the company branding, such as the logo and color theme, during the setup process if you have configured it from the Entra admin center.
After Entring device Name, we will register device directly in Microsoft Intune, for this you need to Press “Shift + F10” to open command line.

This step can take 15 minute or more depending on configurations profiles and pplications to install.

This window appears after the machine preparation process is complete (previous window). At this point, you must log in with an account that is part of the authorized group in Microsoft Intune (in our case, we chose “All users”) and that has a license assigned with the Intune features included.
Here I’ll connect using my account :


This setup is part of the Windows Hello feature, which provides a fast and secure way to sign in to your device, apps, and services. Remember to create a strong PIN that’s hard to guess and keep it confidential.

This screen typically appears after a user has finished configuring and updating their Windows operating system and has set up a PIN for quick access. Remember to keep your PIN secure and not share it with others.

After connecting to Windows, you will be able to see your home screen :

If you want to check your Microsoft Intune join, go to :
As you can see, a new machine named GIT0100 has been added as joined to Intune.

If you want to check Microsoft Entra Join, go to :
As you can see, a new machine named GIT0100 has been added as joined to Entra ID.
As you can see here, Autopilot devices have the icon purple color.

In conclusion, this guide has covered in detail the steps required to set up Autopilot. However, setting up Autopilot is only the beginning of optimizing your IT environment. There are many other aspects of Microsoft Intune worth exploring.
For example, the “configuration profiles” in Intune offer a wealth of possibilities for managing and securing your devices. They enable you to configure specific settings on your devices, such as Wi-Fi, VPN, messaging settings and so on. What’s more, they can be used to enforce security and compliance policies.
We encourage you to continue your exploration with other Intune technical guides. Each guide will help you deepen your knowledge and further improve your IT environment.
Stay tuned for more technical guides to come!
Thanks